Denver on a Budget (with kids!)

Our most recent road trip took us through Colorado. While we splurged on a few unique activities, our pockets aren’t bottomless. Thankfully, Denver came through as a great place to explore without breaking the bank. I hope you find some of these suggestions and reviews to be helpful!

View down a Denver city street with the state capitol building visible in the distance
We didn’t end up visiting the capitol, but that’s one more place you could tour for free during the week.
Continue reading

Earth’s Layers Cake: The Low-Tech, DIY Version

cakeMy kids wanted to study volcanoes.  I was totally uninspired by volcanoes, but I thought I’d run with it, perhaps expanding the study to include plate tectonics and the rock cycle so we’d have a bit more to talk about.  While I was searching for inspiration, I ran across the idea of having a cake to show Earth’s layers.  “Great!” thought I.  “Sign me up and show me how!”  (I’m a sucker for anything edible–particularly if it’s sweet!)  Unfortunately, everyone doing this project seemed to have round bakeware–cake pop molds of varying sizes, round-bottomed oven-safe mixing bowls.  Not I.  And, since I am disinclined to shell out that kind of money for the props to make one cool snack, I thought I’d look for my own way.

My creation doesn’t have perfectly-nested spheres (in fact, the outer core seems to spike into the mantle in a couple of places!), but it definitely has the layers, and–most important of all–it got the point across and thrilled my kids.  In case you want to try it, here’s what I did:

Supplies: White or yellow cake mix/recipe, chocolate frosting, white frosting, food coloring, multiple bowls for separating/mixing colors, two 8″ or 9″ round cake pans, large spoons, two cookie cutters (round is ideal–I didn’t have round), cake decorating set

1. I used a generic white cake mix (yellow would be fine, too–I use the yolks, so mine isn’t truly white).  After mixing the ingredients, I separated the mix into three bowls: a small one that I colored yellow, a medium one that I colored orange, and a large one that I colored reddish.  Make sure the mix is pretty colorful, since the color will be less concentrated once the cake poofs up during baking.  (Too much food coloring tastes bitter, though, so don’t go overboard.)

cake01

2. First, I placed a cookie cutter in the center of each pan.  The first one I filled with a dollop of yellow (inner core).  I spooned pink (mantle) around the edges of that pan and filled the space between with orange (outer core).  In the second pan, I filled the cookie cutter with orange (outer core–to cover the inner core from the first pan) and poured pink (mantle) all around it, reserving a small amount of the pink for the next step.


cake02

3. Then I removed the cookie cutters, covered the dollop of outer core in the second pan with a layer of mantle, and popped both pans in the oven.  (The first pan–with all three layers–had less batter, but both seemed to cook fine.)

cake03

4. When the cake was out of the oven and cool, I used a small amount of runny white frosting (I warmed mine to make it thinner) to glue the layers together.  The three-colored layer went on the bottom, capped by the layer that’s mostly mantle.  Make sure the little bit of outer core is on the bottom of the top layer–you wouldn’t want to have your mantle and outer core reversed!  Next, I used a very thin layer of chocolate frosting to represent the lithosphere.

cake04

5. This gray represented the solid rock of the crust.  I wanted to make it clear that even the oceans have crust beneath them.  Yes, I know the crust is included in the lithosphere, but the Red Cross/PBS material (more on that later) we’re using talks of them separately, so I just followed their lead.  I used really runny frosting so I could make a very thin layer.  (After all, this is already the second frosting layer, and I still had more to go!)  The generic brand frosting I use wins for runniness!  My gray, FYI, is made from a red/green mixture.  If I remember right, it was two red drops and three green.

cake05

6. Time to add the thicker continental crust parts and fill the oceans!  This time I thickened the frosting slightly with about a cup of confectioner’s sugar to the tub.  I wanted it just stiff enough to hold some texture, but still soft enough to spread in a thin layer.  Since we’re also studying the Middle Ages right now, I decided to do a rough map of Europe.  (Very rough.)  I rarely use the frosting tips as intended; I used the star tip loosely for a textured water look, but for the land I just did a rough outline with a tip and then spread the green around with my knife.)

cake06

The finished product!  Of course, you can’t really tell how many layers of frosting went into this (except when eating it!), but if the kids watch or help, they’ll get every detail of the process.  And the finished result was enough to spark their glee, so I’d consider this one a win!


printable activity pages for kids

If you’re headed on vacation and need something to fill the hours spent traveling–or if you’re merely trying to find something to fill a rainy day–there’s a wealth of fun to be had just a printer away.  Here are some of the options I found in a quick search.  (As of my search, these sites were functional and safe.)

Sudoku

  • Activity Village offers number or word sudoku at various levels of difficulty.
  • Science Kids has a page with a selection of sudoku puzzles from easy to hard.

Logic Puzzles

  • LoveToKnow has a page with a few different puzzle types: traditional logic puzzles, nonograms, and sudoku puzzles.
  • Printable Puzzles has free samples of their logic puzzles at four levels of difficulty.  You can access four of the easier types and two of the harder types for free; if you find yourself addicted, you can always pay a few dollars to access a few dozen more.

Connect-the-Dots

  • Coloring.ws has connect-the-dots sheets organized by theme or by difficulty.  You can connect the letters of the alphabet or numbers, and they range from 9 dots to 45.  You can even choose to increase the challenge by counting by twos, fives, or tens!
  • Raising Our Kids offers sixty free connect-the-dot pages.  The easiest have ten dots, while the hardest ones have more than one hundred.

Coloring Pages–for all ages!

  • Step ColorinG provides a searchable database of images, from very simple pictures for little ones to complex geometric designs for older kids (or adults!).
  • Super Coloring has images organized by theme.  Each animal kingdom is represented (plus dinosaurs), and there are also categories for flowers, fruit, and cartoons.

Hidden Pictures, Crossword Puzzles, Color-by-Number, Mazes

  • All Kids Network has all of the above and then some.  Drop in to find the right activity and difficulty level for your kid!
  • Raising Our Kids also features a wide variety of activity options, particularly if you have a preschooler (though they also have puzzles that are better suited to older kids).  Several of these activity pages are ones I’ve seen in the generic coloring books you can buy in most stores.


road trip tips: a survival guide for parents

Four years ago (!) I posted some of my road-trip tips for traveling with young kids. While some of those tips and tricks are ones I still use, I thought it was about time for an updated version including suggestions for older kids, especially since we’re anticipating a 20-hour drive back “home” to see ‘Love’s family again in a few weeks.

Goober has NEVER been a good car rider.  As an infant, she couldn’t even make it the five minutes to Grandma’s without screaming.  Last year we made it 30 minutes into our first day of driving when she announced, “I’m done sitting in the car.  How much longer until we get to the hotel?”  Knowing her personality, I always make extensive preparations for car entertainment.

Let me say right from the start that I have the world’s only children who do not sleep in the car.  Since that’s the #1 road-trip tip I hear, I figured I’d best include that one up front. If your kids are car sleepers, consider yourself lucky and take full advantage. For anyone whose children are odd like mine, here are some alternative suggestions.

There are some items no child-carrying car should be without on long trips.

  • Baby wipes.  No baby, you say?  No matter–take them anyway.  They come in handy if the gas station restroom is out of soap, if someone has greasy or sticky hands after a snack, if someone pukes in their lap…
  • Gallon Ziploc bags.  An odd one, perhaps, but handy.  Kid feeling queasy after eight hours in the car?  Hand him a bag.  If he uses it, you can conveniently seal the bag and contain the smell.  Toss his shorts in a second bag if his aim was off.  The bags are also handy for transporting wet swimsuits, containing opened snack packages, keeping the twelve hair-ties your daughter HAD to have in when you left and can no longer stand an hour later, and more!
  • Sunglasses for all!  You’d hate to get to a rest stop only to have the blinding sun prevent anyone from running off some energy.  Toss these in a Ziploc and keep them at-hand just in case.  Toss in sunscreen and hats if your skin is sensitive enough to burn in 15 minutes.  No one wants sunburn!
  • BandAids.  Hopefully you’ve got a stash of these in your car already, but if not, toss them in.  A reckless kid at a rest stop will often find a way to make them necessary.  Pull out the baby wipes to clean off the dirt, and slap a BandAid on top.
  • Your favorite pain reliever–for yourself and the kids.  What could be worse than driving through rush-hour traffic in the blinding sun at the end of a long day while your kids argue in the back seat?  Doing the above with an aching back or a searing headache.  And you know how cranky your kids get when they’re feverish or headachey?  Better throw in something for them, too.
  • Food, water, and entertainment–but you knew that.  See below for more tips on this particular category.

Road Trip

A good road-tripper is well-prepared.

Use rest stops to play, NOT to eat.  I start feeding my kids about 45 min-1 hour before we plan to stop.  (I bring sandwich fixings or crackers, fruit, veggies, cheese sticks, or even Lunchables for meals.  Snacks consist of non-crumbly granola bars, Teddy Grahams, mini pretzel twists, Nilla Wafers, Goldfish–anything that can’t melt and either doesn’t crumble or can be eaten in one bite.)  A small cooler crowded by my feet in the front comes in handy, or I’ve used the cooler as a footrest for someone sitting in the center of the row behind me.)  Usually this is the point at which the kids are getting restless and food helps stretch their “sit” by a little.  By the time we stop, liquids have made their way through the kids’ systems (or will before the stop is over).

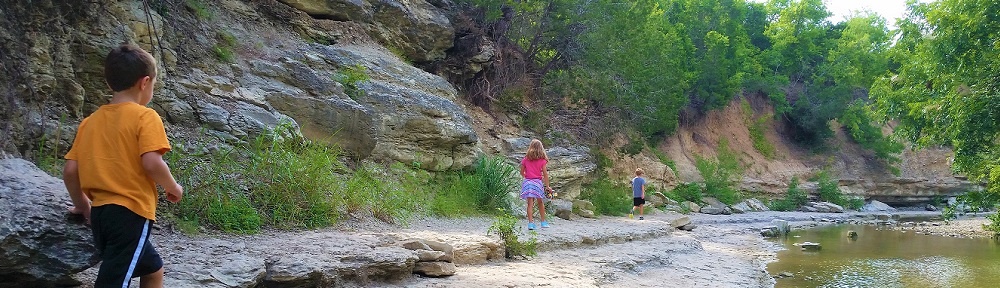
We try to find rest stations with lots of open space or a playground or a fast food joint with a play area (and the adults have a snack).  I even research rest stops along the route to find out which ones are closed for renovations, which have a reputation for cleanliness, which have space for kids to roam.  I often list several top choices so we can shorten or lengthen our time between stops as needed.  We spend 15-20 minutes playing hard (with adults chasing kids if necessary to make sure kids use maximum energy) and using the bathroom.

On a related note…non-melting candies (especially things that go slowly, like DumDums) are good distractions between snack and meal times.  I’m not usually one to load my kids up on junk food and candy, but road trips are my once-a-year exception.

Stop as few times as possible. We fill up on gas each time we stop–whether we need it or not–so we don’t have to make an extra stop for gas later.  Even a quick gas stop or potty break will likely add at least 15 minutes to your trip, and on a long trip, no one wants extra time in the car.  Remind those with suspiciously wimpy bladders that every stop will take away from evening pool time (see below) or at the very least add to the length of the drive time.  If nothing else, maybe the groans of their siblings will help to delay their demands to stop RIGHT NOW.  If you do stop, require everyone to try using the bathroom lest you get back on the road and have someone else claim a bathroom emergency twenty minutes later.

Make sure each day ends with a pool.  I reserve a hotel with an indoor pool because I remember as a kid being heartbroken when we drove all day and then it was too cold or stormy to swim.  Swimming even for an hour uses tons of energy and helps everyone sleep better, as well as giving everyone something to look forward to all day long.  On the plus side, most hotels with indoor pools also include a hot breakfast, so while you may be paying more for the night, considering that extra $25 bought everyone some pool time and as much breakfast food as they can fit (not to mention something to look forward to all day and enough exercise to sleep well), it’s not a bad deal.

Long car trips are a time to make exceptions about tech use.  We have a tablet that we let everyone have a 20-minute turn on–sometimes once in the morning and once in the afternoon.  Last year I also played a DVD on my laptop toward the end of each afternoon when everyone was getting really restless. (Sadly, my DVD-ROM drive seems to have died.)  Those prolonged distractions were lifesavers!

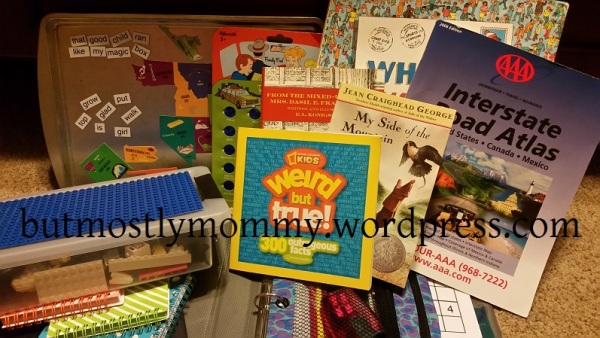
Contain your paper clutter while providing ample activity options.  I make each kid a binder (built-in hard writing surface) with coloring pages (cool geometric designs for older kids), mazes, blank paper, logic puzzles, sudoku, crosswords, dot-to-dots (everything from simple to extreme)–anything I can find that they might like–and include colored pencils plus a little sharpener (with a securely-attached case to catch shavings) in a zipper pencil pouch at the front.  (Why colored pencils?  Crayons melt in a hot car and markers tend to accidentally bleed or have their caps left off or get dropped and leave marks or “accidentally” form designs on children’s skin.)  Though I looked at various books available for purchase, I ultimately searched online for free sample pages and was able to print off and put together a book with more variety than I could have purchased.  I put together a list of activities and where I found them, if you want me to save you some legwork.

Magnetic trays work well for lots of activities.  We have jelly roll pans (cookie sheets with a lip around) that are magnetic (not all are–test before buying!).

  • When my kids were little, I printed a picture of one of those rugs with the roads on it (sized to fit my tray) and laminated it for the kids to use while playing with cars. I even hot-glued magnets to the bottom of the cars so they would stay where they were driven. My 4-year-old still loves this, and even the older two will play around with it for a while.
  • I take a baggie of magnetic letters for the little guy and a baggie of magnetic poetry for the older two.  They enjoy trying to outdo each other by making ridiculous, nonsensical stories or sentences.
  • Have some tangrams or magnetic puzzles?  The tray is handy for spreading out pieces and keeping spare parts from getting lost between the seats.
  • I pack each kid a small container of Lego pieces (with a base piece hot-glued to the lid).  The tray offers plenty of space to place the small tote on one side and use the remaining space to build.

Ponder favorite game options that would work well for travel.  Many games offer specific travel versions, but games like Guess Who?, Rush Hour, Rory’s Story Cubes, Mad Libs, and others can easily be enjoyed on the go.  And don’t forget the classic Road-Trip Bingo cards!  I picked up a few in Target’s dollar section recently.

Use your ever-changing location to spark interest!

  • As soon as my kids started reading, I always printed a map of where we were going and highlighted our route.  Now my kids have their own atlases, and Peatie spends most of the trip simply looking for each town as we go and telling us how far away things are and what we’re passing.
  • Having the kids look for needed signs (exits, interchanges) is great even for littles who just know a few letters (“We’re looking for a sign with a word that starts with S!”)–except if they get too competitive.
  • If you’re driving past or stopping at any points of interest, part of each day could be spent talking or reading aloud about what you’re going to see and why it’s important/exciting.  My kids always enjoy destinations more when they’re primed.
  • Classic activities like the alphabet game (you know–where you find your ABCs in order as you drive) are always good bets.
  • When I was a kid, my siblings and I would keep statistics on various things.  We’d note which state license plates we’d seen and how many of each, or we’d track vehicle types or colors throughout the day.  I suspect my kids may be old enough to start enjoying this now.

Use your stereo system to the fullest. 

  • Audiobooks can entertain many a child for hours at a time, whether they’re following along in a book or simply enjoying the story.
  • My kids don’t like audiobooks, but they do like to sing along to favorite songs.  If I can get them doing motions, they work off some energy at the same time.
  • I’m hoping to snag some good educational songs on CD or MP3.  If we can memorize the state capitols, books of the Bible, elements of the Periodic Table, multiplication tables, or some other glorious facts whilst we pass the miles, all the better.
  • Classical music can work magic.  When everyone is angsty from too long in the car, someone is always unhappy about the CD we’re listening to.  For some reason, no one complains when I pop in classical music.  The kids talk about the instruments they hear, what the music makes them think of, which songs are their favorites, or simply sit and mellow out while looking out the window.  Daddy sighs with relief that he doesn’t have to listen to kid-safe, peppy music.  I love it!

Books hold a multitude of possibilities.

  • While my kids balk at audiobooks, they love to listen to me read aloud for long stretches of time.  (Go figure!)
  • A few new books can be special treats.  Especially engaging are books with detailed pictures (anyone’s littles LOVE Richard Scarry?) or new books from a favorite series.
  • Search-and-find books are good for whiling away the hours.  ‘Love still had his old Where’s Waldo? books and we’ve picked up a few I Spy books, as well.  Even if they’re not searching for the items, the kids enjoy looking at all the details in the pictures.

Sometimes they just need to fidget.

  • Our pin art toy is a perpetual favorite for car trips–though my sister-in-law tells me that her plastic version is quieter and thus less irritating to fellow passengers.
  • I keep a couple squishy balls or animals from the dollar store on hand for trips.  Even if you can’t really DO anything with them, they’re fun to squish through your fingers while looking out the window.
  • My cousin said for road trips she always buys each of her kids a roll of masking tape.  Apparently it keeps everyone busy for quite a long time, from the preschooler sticking it all over himself to the older kids attempting to create clothing, jewelry, or other items by sticking pieces together.  I may try this!
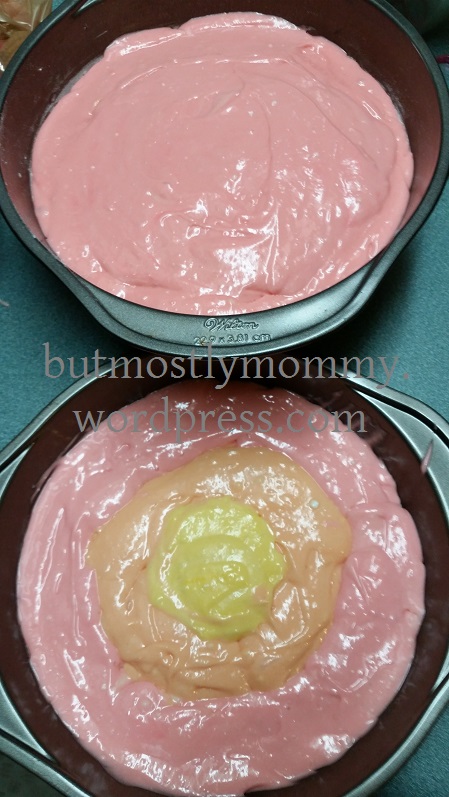
hands-on history/experiential science: dinosaurs

Out of the blue, the kids decided that dinosaurs sounded like a fun topic of study, so I dutifully planned to incorporate a dino study in our next six-week block.  (We have taken to block scheduling in six-week increments, and it’s glorious!)  I had a little more trouble with the “hands-on” and “experiential” portion of this study, but I did my best!

Background: Fossils and Paleontology

Fossil

Our finished product left us with both an artifact and its imprint.

To begin our study of dinosaurs, I wanted to provide a little background information on fossils and paleontology.  I began our study with these three activities, which I did on three separate days.  The book Fossils Tell of Long Ago (Aliki) provided a snuggly way to reinforce the hands-on learning.

  1. Discovering Fossils – This first activity requires a bit of advance preparation.  Select a small object to be your “fossil” and wrap it inside a small lump of air-dry clay.  I chose a coin, since I figured it wouldn’t break and cause dismay if my kids accidentally chipped away at their clay with too much vigor.  Make sure your air-dry clay lump is not too big or it will take an eternity to dry and/or crack open as it dries.  Mine was fine within 12 hours, but I kept it small.  (I’ve also seen this activity done by coating objects with petroleum jelly and using plaster of Paris to bury them, but I already had clay on-hand.)  When you’re ready for your activity, provide your kids with a few different tools to uncover their fossil.  We used small screwdrivers for the grunt work and paintbrushes for the final dusting.
  2. Fossil Imprints – Often what paleontologists find is what ISN’T there.  We happen to have some bathroom tiles with impressions of various leaves stamped into them, which we used to discuss fossil imprints.  We also have a local park at which the planners thought they would cleverly imprint various animal tracks in the wet cement (except that at times you can see the marks of the tool they used to roll on those tracks…).  Both these and some PlayDoh fun allowed us to see what sorts of imprints plants and animals might have left behind.

    Paleontology

    This small paleontologist tries to identify a fossil to assemble his skeleton.

  3. Assembling Fossils – Well, your little paleontologists have discovered some fossils–now what?  Using some little dino skeleton kits from the dollar store, we pieced together a couple dino skeletons.  We discovered that even with instructions this is pretty hard work because many of the pieces look alike.  It’s hard to imagine how real paleontologists can take the few bits they find and determine what pieces they are and what type of dino they belonged to!

Dino Basics

  1. Introductory Reading – Once we had some background knowledge, it was time to introduce some basic information about dinosaurs.  We read both the picture book Magic School Bus: In the Time of the Dinosaurs (Cole) and Magic School Bus (Chapter Book #9): Dinosaur Detectives, but much of the information is redundant so you could easily choose either one or the other.

    DinoCharts

    We posted our charts and some of the kids’ creations on a wall.

  2. Dino Periods: A Quick Research Chart – Did you know that the “time of the dinosaurs” was actually divided into three distinct periods?  Not all the dinos you’ve seen on T-shirts were alive at the same time, and the world was a vastly different place from the beginning to the end of the era.  We checked out the book When Dinos Dawned, Mammals Got Munched, and Pterosaurs Took Flight: A Cartoon Prehistory of Life in the Triassic (Bonner) to give us a glimpse of the vast amount of time we were studying by taking on the topic of dinosaurs.  While some of this probably went right over their heads, it had a LOT of information on the Triassic Period presented in humorous text and delightful cartoons.
    If we had been doing a more in-depth study, I likely would have studied each period on its own.  As it was, I knew we were just planning a brief overview.  So our next step was to compare the periods and make generalizations about their climate and vegetation, as well as noting which types of dinosaurs lived in each period.  I handed the kids a few books with each period marked and had them read and look for facts about each era, which I then copied onto a chart.  They were surprisingly enthusiastic about this project and were delighted to admire the results of their “research”.  (See our resource list below for book ideas.)
  3. Overview: Oral Reading and Notetaking – Next we began a more thorough overview of the actual dinosaurs.  For this, I chose to have the kids read the Magic Treehouse Research Guide #1: Dinosaurs (Osborne).  They took turns reading chapters aloud over the course of several days, and as we made our way through the book, I suggested that each of them take notes on things they found interesting.  Goobie chose to illustrate her observations, while Peatie preferred to make long lists of facts.
    • Dino Eggsperiment – In the course of our reading, we stumbled across a few interesting tidbits about dinosaur eggs.  For one, they were probably a little spongy like reptile eggs, so they wouldn’t break when they were laid.  (Some eggs have been found in a row, so some dinosaurs may have laid eggs as they walked!)  We used a chicken egg compared to a playground ball to visualize this difference and the reason behind it.  (What would happen if you dropped each from a foot or three off the ground?  Try it!  Which one would a baby dinosaur need to be inside to survive?)
    • Dino Eggsperiment, Part 2 – Additionally, paleontologists believe that the biggest dinosaur eggs would have been no larger than about 10 inches, or roughly football-sized.  Why?  Because the bigger the egg, the thicker the shell would need to be to support it, and they figure a baby dino couldn’t have broken out of an egg larger than that.  We used clay (PlayDoh would also work) to help kids visualize the thickness vs. size comparison.  You can make a small cup shape with very thin sides, but if you try to make a bigger cup with thin sides, it will collapse.  Have them use toy dinos to try to break through a thin-sided cup and a thick-sided cup.  What’s the difference?

Digging Deeper

  1. Organizing Information: Dino Cards – Now that we had a basic overview of the Age of Dinosaurs and some knowledge of dinosaurs themselves, it was time to dig in a little more.  Using our various books, we took a couple days to search for more information on the dinosaurs we had taken notes about during our reading–and discovered a few other interesting ones along the way.  We made a notecard for each dinosaur, listing the period in which it lived, the family it was part of, its size, what it ate, and any other interesting tidbits we learned.
  2. Herbivores vs. Carnivores: A Comparison Chart – It was time for a new chart.  This time, we compared meat-eating dinosaurs with plant-eating dinosaurs, using our various books to check what we thought we knew about each variety before writing the facts on our chart.
  3. Dino Reports – Each of the kids chose their favorite dinosaur to write a brief report on.  Using the facts we’d listed on our cards, they crafted a paragraph about their dinosaur of choice.  I loved how each kid’s paragraph showed which bits of information they valued and really incorporated their voice into the telling of the facts.  Having already collected facts together, the kids merely had to select which ones to include, choose a logical order, and turn the bullet points on the card into full sentences.  Actually, this was rather like the IEW (the Institute for Excellence in Writing) method.
  4. Dino Measuring – Finally, we took a handful of our dinosaur cards and set about measuring the relative sizes of the dinosaurs.  We happen to have a nearly straight shot from one end of our house to the other, so we were able to measure from the front door and place labeled painter’s tape to mark the lengths of the various dinos.  (Though we couldn’t fit a Diplodocus!)  Then we hung the matching dino card on the wall beside the tape mark.

DinoTour

A measurement marker is visible on the floor, while our display wall marks the end of the dino measurement walk.

The Big Finish: Dino Tour

For our grand finale, we invited Daddy and Grandma and Grandpa to see what we’d learned about dinosaurs.  (This was the kids’ idea!)  The kids started at the front door and showed them our dinosaur measurements and dino fact cards (making sure everyone noticed the most interesting facts), pointed out our comparison charts and a few assorted other creations hung on the wall, and topped off the tour by reading their reports.  They were so proud of themselves, and the grown-ups got to share a little of that joy and learn a little something new.

Resources:

  • Fossils Tell of Long Ago (Aliki) – A good early-elementary picture book on what fossils are and what we can learn from them.
  • Magic School Bus: In the Time of the Dinosaurs, Magic School Bus (Chapter Book #9): Dinosaur Detectives – The facts in these are, of course, more like accessories to the story, but they are a nice, gentle way of introducing some basics.
  • When Dinos Dawned, Mammals Got Munched, and Pterosaurs Took Flight: A Cartoon Prehistory of Life in the Triassic (Bonner)- This included way more info than we could really process in the single day we gave it, but it’s a brilliant mix of humor and information that was fun to read.
  • Magic Treehouse Research Guide #1: Dinosaurs (Osborne)
  • ‘Love’s ancient copy of Dinosaurs and Other Prehistoric Reptiles (A Giant Golden Book by Watson) – While this had a LOT of text and not many pictures (though it certainly made sure to have realistic gore), we did skim some of the surprisingly-conversational information contained in it.
  • The Children’s Dinosaur Encyclopedia (New Burlington Books, Consultant Prof. Michael J. Benton) – This one had dinos organized by family with facts about the family and then details about each dinosaur.  It was pretty cool!
  • Dinosaur (DK: Eye Wonder) – This is a great book for early elementary because the text is large, the reading level is pretty simple, and there’s not too much text per page.
  • Walking with Dinosaurs: A Natural History (Haines) – This one was more texty than we needed, but the photo-realistic images of dinosaurs in their likely habitats were really cool to look through!
  • The Usborne Internet-Linked Encyclopedia of World History (p. 42-59) – I was surprised to find several pages devoted to dinos in here, and the information was actually pretty nicely compact and easy to comprehend.

15 inspirations to get your family outside

Now that our weather has become truly pleasant, the outdoors has been calling me.  Sometimes it takes a little extra motivation to get us all out there, but I always find it to be so worthwhile when I make the effort.  To get everyone in the spirit of spring, I’ve listed a handful of inspirations for heading outside with your family.  Hopefully there’s something for everyone on this list!

BeachExercise

  1. Go for a walk, either in your neighborhood or in a local park or preserve.
  2. Haul out your bikes, scooters, roller blades, skateboards, plasma cars, unicycles…
  3. Play a game: run a race, practice your sports skills, play tag…
  4. Climb–anything.  It could be a tree, a lighthouse, a mountain–take your pick!
  5. Swim, or at least move around and play in the water!
                                Explore
  6. Go somewhere new, be it a new bike trail or a new park or beach.
  7. Spend time outside in a usual spot, but experience it in a new way. Lie on your back and look up at the trees, get down on your stomach and inspect insects through a magnifying glass, close your eyes and listen carefully to the sounds you hear.
  8. Go geocaching and see if you can improve your skill at spotting camouflaged objects.
  9. See how the wind is moving–fly a kite or a model airplane or try to make a sailboat.
  10. Look for small wildlife. Take some nets and containers and try to catch a minnow or tadpole in the stream; enjoy it for a while and release it back into its habitat. Find some bugs and pop them into a magnifying bug-hut for closer inspection. See how many different types of plants you can find and photograph.
                                                                         Create
  11. My kids could spend hours imagining outdoors, cooking with leaves and dirt, building forts from fallen branches, crafting furniture and fixtures from rocks and nuts.
  12. Take a sketchbook and take time to draw what you see.
  13. Take photographs of everything you find that’s living, then begin to make your own local guidebook, researching the names and details of the things you’ve photographed.
  14. Make art in or from nature. Stack rocks, paint rocks, make acorn-hat boats, paint pictures with water on rocks or with mud on paper or on yourself. Make leaf rubbings, leave prints in mud, try painting with berries or flowers.
  15. Make your own alphabet or number or shape book by hunting for your selected topic outdoors. A rectangular window, a curved stick resembling an S, a pavement crack that looks like a 4—your kids will find incredible variety once they start looking!

Enjoy the fresh air, use those muscles, soak up some Vitamin D–but don’t forget your sunblock and sunglasses!

lent: seven activities and crafts to prepare kids for easter

Easter is nearly here, and in our house, we are best-prepared for the things that we spend the most time anticipating.  With that in mind, I’ve taken some time to write out some of the crafts and activities we’ve used from year to year to heighten our anticipation of Easter.  The activities below can all be done by preschoolers (with help!), but I’ve done them with third- and fourth-graders with equal success because they are the sorts of things kids can do at-level, with the outcome matching their ability.  The top three items are pretty broad, while the last four are specific crafts with instructions.  Without further ado, here are my suggestions.

EasterArt
Prepare To Worship
Are there certain songs sung in your church every Easter–or can you at least guess at a few likely candidates?  Find them on YouTube and play them a few times between now and Easter.  I don’t know about you, but I’m always more excited to sing songs that I know, and I’ve seen the way my kids’ faces light up when they feel like they are really participating in church.  What better way to make their Easter memorable than by making sure they can participate in the jubilant celebration?
[This is a space.  The editor refuses to honor my space, no matter what I do, so here is my solution.  I can’t stand when the formatting looks wrong.]
Act It Out

There’s no better way to learn something than by doing it yourself, and Bible stories are no exception.  From the triumphal entry (paper or foam palm branches, anyone?) to the Last Supper (footwashing and flat bread!) to the empty tomb (where you can peek into your couch-cushion-cavern!), there are plenty of exciting moments for your family to get a taste of.  By performing some of these scenes, you’ll allow your kids not only to hear the stories, but to see them and experience them, reaching across three of the most prominent domains of learning.


Bake

There are lots of options for Easter fun in the kitchen.  From bread without yeast to celebrate the Last Supper (this is our go-to easy bread recipe that we’re going to try without flour this year!) to Hot Cross Buns to Pretzels and Easter Cookies, there are lots of options that will get you thinking and talking about Easter with your favorite kitchen helpers.


Crucifixion Diorama

PlayDoh or clay (and green paint or food coloring, if it’s not already green)
A variety of small sticks and stones
Thread or hot glue to secure twigs in the form of three crosses

  1. Using PlayDoh or clay (homemade or purchased), form a hill.  (Paint or dye it green if it isn’t already that color.)
  2. Atop the hill, push in three crosses made of sticks. (Parents can have these pre-made for little ones!)
  3. Press your thumb into the side of the hill to make a cave for the tomb.
  4. Place a rock in front of the entrance to the tomb.
  5. Add twigs, rocks, fake greenery, or other decorations as desired.
  6. On Easter, roll the stone away to reveal the empty tomb!


EasterArt1
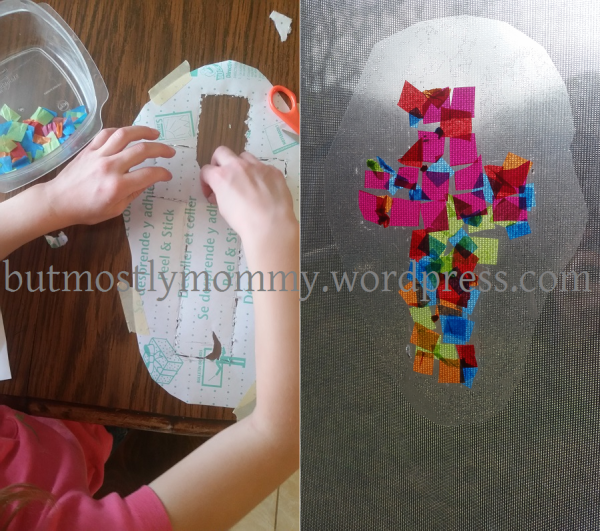
Stained Glass Adhesive Window Cross

Clear Contact Paper
Colorful tissue paper
Scissors
Tape

  1. This craft is simple enough for preschoolers but appealing for a broad variety of ages.  The concept is one I stole from a third grade teacher I worked with. Prepare for your project by cutting several kinds of brightly-colored tissue paper into small squares roughly .25″ on a side–a handful of each color per child.  Precision is not important, nor is the number of squares; you just want enough for them to cover their cross shape with a few extras to allow for color choices.  (Older children can do this step themselves, but little ones will be happiest if their supplies are all ready to go before they sit down for the project!  For my preschooler, I have to do all the prep; he can take over at step 7.  My older kids still need help with step 5, but they can do the rest on their own.)
  2. Take a piece of clear Contact Paper and trace a generous-sized cross shape on the paper backing.  (Around 4-6″ wide by 8-10″ tall is plenty large.)
  3. Cut your shape from the unused Contact Paper, leaving about an extra inch of paper all around your pencil lines.
  4. Tape the edges of your Contact Paper shape, backing side up, to your work surface to hold it flat and still.
  5. Open a scissors all the way, and use one point of the scissors to score the paper all along your pencil line.  The scissors will tear at the paper, but it will only stretch the Contact Paper if it even manages to hit it at all.
  6. Using your scored lines, peel away the paper inside the cross shape, leaving it blank and sticky.  Leave the outer border covered by paper.
  7. Using small squares of colored tissue paper, cover the cross shape. (For little ones, a smaller cross shape or larger tissue paper squares help the project get done within the limits of their patience.)
  8. Once the cross shape is completely filled in with color, remove the tape that holds it to your table, peel off the remaining paper around the cross, and use this sticky edge to hold your stained glass cross in a sunny window.


EasterArt2Stained Glass Cross Painting

1 piece watercolor or other heavyweight paper
2 strips of masking tape or painter’s tape
watercolor paint

  1. For this simple craft, give each child two pieces of masking tape to form a cross on a sheet of painting paper.  (Regular printer paper will warp horribly and tear easily.  You’ll want to use something labeled at least 70 lbs or “heavy weight”.)
  2. After sticking your tape to the paper, use the bowl of a spoon (or anything similarly hard) to rub all over the tape and press it firmly down—you don’t want any paint to seep under the edges of the tape and ruin your cross shape.
  3. Use watercolors to paint all the exposed paper.  Putting two wet colors against each other will cause them to bleed and blend with one another, which is typically a problem for young painters but actually achieves a nice effect in this project.  The darker the colors, the better, so don’t water them down too much!
  4. When you’re finished painting, wait for the paint to dry and then carefully remove the tape to reveal a stark, white cross amidst the beautiful swirl of color.


Stained Glass Window Silhouette

1 coffee filter (the kind that can be flattened into a large circle)
Washable markers
Water, preferably in a spray bottle
Black construction paper

  1. Trace around the filter on the black construction paper, then set it aside for later.
  2. Flatten the coffee filter and scribble all over it with the washable markers.  Leave a little bit of white space between your lines for best effect—but not too much.
  3. When you’re satisfied with your scribbles, place your coffee filter on a plate and spritz it with water.  The water will cause the washable marker to bleed across the filter, making some wonderful swirls of color.  Let your filter dry.  (This will take quite a while—you’ll need to get rid of excess water on your plate and prop your filter up so it gets more air movement.  Gently blow-drying can help speed up this process.)
  4. While your filter is drying, you’ll make a construction paper frame.  You can choose to leave the outside of your frame precisely the same size and shape as the filter outline you made earlier, or turn your frame into a square, a wiggly shape, or anything else that appeals.  Draw a slightly smaller circle inside your traced circle. This is the space through which your “stained glass” will be visible.  You can add a cross—or three—if you’d like, blocking those out in the center of your smaller circle.
  5. Cut around your frame—outside first, then inside.  If you manage to botch your cross-cutting, you can always use a glue stick or add a few dots of glue and attach them later.  (A few dots of glue may be necessary, anyhow, to keep your crosses standing.)
  6. Once your filter is dry, attach it to the frame using a glue stick or some tape.  (Wet glue will leave wrinkle marks in the paper frame, so only use that if absolutely necessary.)  These look lovely hanging in a window with the sunlight shining through.

experiential science: maps and mapping

As I mentioned in my last post, my kids’ idea of science is hands-on fun, so I’ve been supplementing the Building Foundations of Scientific Understanding (BFSU) book with lots of activities.  Here’s what we’ve been doing in the past few weeks with maps, based mostly on BFSU lessons D3 and D3A, which you can read for more ideas, terminology, and discussion starters.

**Caveat: My kids have long been intrigued by maps, so we’ve studied and drawn maps quite a bit.  If you have not done this, I’d suggest reading through something like Joan Sweeney’s Me on the Map to help your kids get a basic idea of maps and mapping before you start. BFSU also suggests a lot of pondering maps together.

Activity 1: Spot the Error

Make a few maps of places with which your kids are familiar–rooms in your house, your neighborhood, etc.  On each map, include one or more errors.  These could be misplaced items, missing elements, or even things that are out of scale.  See if your kids can spot the problems, and talk about how important it is for maps to be accurate.  Do cartographers include everything on their maps?  How do they determine what to include or not include?  Is there ever a time it’s okay to have some things not to scale?

Activity 2: Create-Your-Own

Have kids choose a familiar place and make a map of it.  Your accuracy requirements can match your child’s ability, but do remind them of what they learned about scale and accuracy in the previous example.

Activity 3: Treasure Hunt

Make a few treasure maps of your home, yard, or neighborhood, complete with an X to mark the treasure.  (Make sure to take time in advance to hide something!)  We like to have bits of our snack as treasure, but anything will do, so long as your child is able to successfully navigate to the treasure.  This works best if you start simply–a map of the room you are in–and get more complex, working up to a large map that requires them to navigate through the house or to a point across the park.  If you really want to amp up the excitement, you can have the first two or three maps form a chain (use one map to find the next one) that leads to the treasure.

Activity 4: Geocaching

What better way to make map-reading seem useful than to introduce kids to the modern version of a treasure hunt!  We signed up online and downloaded the free app, and my kids had a great time trying to figure out how to read the maps to figure out where to look for the caches–and even more fun when they got to trade loot!  (They were especially motivated because they had just read The Boxcar Children book The Box that Watch Found, which was about geocaching!)

Activity 5: Navigation Practice

Planning to go somewhere new?  Inviting new friends to your house?  Have your child look at a map and write directions to a particular location, using street names and cardinal directions.  Then head out in the car and test their work!  My oldest is remarkably good at this.  (I’ll wait a few years before I try following any directions given my my little guy!)

Activity 6: Backup Plan

Maps

Apparently sundials work best when well-decorated.

What can you do if you find yourself without a map and your smartphone dies?  Well, folks haven’t always relied on smartphones or even maps to navigate.  Enter–the sun!  After reviewing the cardinal directions and relating them to our place in space, we began pondering the way in which the sun appears to move from east to west and talked about how that knowledge could help us.

  • Sundial – Using these directions from the National Wildlife Federation, we made sundials.  I have no idea how they thought pushpins would hold the plates to the ground, but we had to weight each one with a heavy stone.
  • Shadow Tracing – We traced each child’s feet on the driveway–be sure to leave plenty of space between the kids!–and returned to the same spot throughout the day to trace our shadows.  This made it easy to see how shadows shift in relation to the direction of the sunlight.

experiential science: solutions and crystallization

We’re studying science through Bernard Nebel’s Building Foundations of Scientific Understanding (often simply referred to as BFSU), which is a delightful program.  We’re still working through the first book, intended for grades K-2.  Nebel walks through each topic, explaining concepts and terminology to the instructor, giving guidelines for sharing the material with students (mostly through Socratic discussion), and providing a list of useful books.  Lessons are not strictly linear, but weave between the branches of science and can be arranged as best suits the learners–though Nebel explains that certain concepts must be understood before others can be introduced. The only lack in Nebel’s material, in my opinion, is its minimal use of hands-on exploration.  While most concepts are introduced with a demonstration, they are often developed verbally.

My kids LOVE science, but when they think science, they think messy and playful. So instead of trying to look elsewhere for curriculum, I decided to build on the awesome foundation provided by BFSU by doing quick searches for hands-on ways for my kids to experience the concepts.  I thought I’d share my results here.

Though I’ve been doing this for a while, it just now occurred to me to share my work, so I’ll start with one of our recent units: solutions and crystallization.  The activities and our discussions were based on Lesson A-9 in the first BFSU book.  You can read for yourself to glean discussion points, but I’ve listed my activities below.

mixorsolutionActivity 1: Mixture or Solution?

First we had to determine the difference between a simple mixture (which we’d already discussed) and a solution.  I’ll list my supplies below, but don’t feel bound by what I used–I just chose what I had on hand.  Nebel describes a simpler form of this activity in his book.

  • Supplies: clear containers, water, stirrers, various substances for mixing
  • Gather a variety of similar-looking substances.  I chose sugar, salt, flour, bread crumbs, vanilla, and sand.  (I also had oil on hand for the oil/water/soap experiment that Nebel describes.  I won’t bother to replicate it here, since it’s in the book.)
  • Assemble one small container of water (preferably a clear container) and a stirring implement (I used toothpicks) for each of your substances.
  • Have your kids stir a small amount of each substance into one of the containers.  What do they notice? Do some behave differently than others?

Activity 2: Crystallization

We did two separate crystallization activities in one fell swoop: Borax and rock candy.

  • Designer Crystals (Requires pipe cleaner, Borax, water, jar, string, stick)
    • Using a pipe cleaner (or two!) let your children form a design on which to grow crystals.  They can make a letter, their name in cursive, or simply some squiggles, but be sure the design can be lowered into your chosen jar (and lifted out again!) without touching the sides or the mouth of the jar.  You’ll need a bit of extra room to get it out once it’s laden with crystals.
    • Tie your pipe cleaner to a string and your string to a stick.  You’ll balance the stick across the mouth of the jar and the string will dangle your design into the water.  Be sure your design will be completely submerged but NOT touching the bottom or sides of the jar–leave at least a half-inch clearance, if not more.
    • Measure how much water it will take to fill your jar, and heat that amount of water.  You can do this via the stovetop or a microwave.
    • Once your water is hot, stir in a generous helping of Borax powder.  Different people recommend different amounts, but this experiment doesn’t seem too fussy.  I accidentally got two batches with different amounts, and both worked fine.  The idea is to super-saturate your liquid.
    • At this point you can add food coloring if you’d like, but the color of your pipe cleaner seems to be more powerful than the color of the crystals.  Wait for your solution to cool before pouring it into the jar (or before handling the jar, if you opted to microwave it).
    • Dangle your design in the jar of Borax water and set it aside where it won’t be disturbed.  Our designs were heavily covered with crystals within hours, to the point where I had to pry them from the bottom with a knife.  The results were pretty exciting!
  • Edible Crystals (Requires skewer, sugar, water, jar, springy clothespin, rulers)

    crystals

    Borax (foreground, already finished) and rock candy (background, looking like nothing yet)

    • Measure your skewer and clip a clothespin on it so it will balance on the mouth of your jar and dangle inside without touching the sides or bottom of the jar.  If you need to, use rulers to make the mouth of your jar more narrow so the clothespin can balance.
    • Measure how much water you need to fill your jar.  Pour this into a saucepan and heat it.  Keeping your water just below boiling, begin to add sugar at a rate of about a half-cup at a time.  I’ve read that you need about 3 times as much sugar as water; I forgot to measure, but I know I used waaay more sugar than I thought I would and had to stir way longer that I thought I should to see if it would dissolve.  (The kids got bored and wandered off.)  By the time my liquid was super-saturated, the top seemed to get cloudy and not clear up even after I stopped stirring and let it settle some.
    • Let your liquid cool until it’s easy to handle.  (Otherwise at the very least you risk burning your hand while handling your jar!)  Pour it into your jar, being careful not to pour any undissolved crystals of sugar into the jar.  (Rock candy is easiest to eat on a stick, not stuck to the bottom of a jar.)  You can add food coloring if you’d like.
    • Balance your skewers atop the jar and be prepared to wait at least a day before seeing any difference at all and a week or more before you have something worth chewing on.  Some people say this process can be sped up by dipping the skewers into the solution, rolling them in sugar, and letting that coating dry before dangling them.

Activity 3: Solar Still

I like to have a “so now what” type of moment about the things we learn.  So how can we use our knowledge of solutions?  I posed a real question to my kids: Suppose you were stuck on a boat in the ocean and you ran out of water.  You know that salt water will kill you.  How can you get fresh water other than waiting for rain?  I could have let them develop the whole thing on their own, but once they had the concept I put together a solar still and had them figure out how it worked.

  • Supplies: salt, water, large bowl, glass or heavy container that fits inside bowl and is shorter, plastic wrap, rock
  • Mix some saltwater in the bottom of your large bowl.  Taste it if you’d like.
  • Place your glass in the middle of the saltwater.  It has to be a glass or something heavy, otherwise it’ll float around or tip and ruin the experiment.
  • Cover the bowl with plastic wrap, ensuring that it is tightly sealed around the edges.
  • Place the rock on top of the plastic wrap, centering it over your empty glass and making sure it slightly depresses the wrap.
  • Put your still in a warm place and wait for the results.  Alternately, you could speed up the natural process by using warm water that will already be evaporating reasonably fast.

12 DIY activities for emerging readers (plus three free online resources!)

Little Pookie surprised me the other day by walking up to his letter cards on the wall (as mentioned in my literacy activities for pre-readers) and pointing to “c” then “o” then “t”–which were not posted in that order on the wall—and saying their sounds. When I asked him what that made, he said, “Cot! Like I had at Grandma’s!” While my older two did this same thing—spontaneously sounding out words—it took me off guard coming from Pookie because he STILL can’t tell all his letters apart. (I know, he’s barely three-and-a-half, but the older two had them down by two or two-and-a-half!) Nonetheless, since he has pleased-ly been looking for words to sound out since then, I guess it’s time to haul out my early literacy activities. In honor of this auspicious occasion (what’s more exciting than your kids learning something new and difficult?!), here’s my go-to list of activities for early readers–in no particular order.  I hope someone finds them useful!

  1. Word Bingo – I made my own bingo cards with simple—and similar-looking—words. Including words like “pen,” “pin,” “hen,” “win,” “hat,” “hit,” etc. forces new readers to look closely at each letter of the word, ensuring that they are not simply guessing based on beginning or ending sounds or the shape of the word. And who doesn’t like playing Bingo?  I’ve made four sample PDF WordO Boards you can download–two with simple, three-letter words, one with initial blends and one with ending blends.  (By using the “cover all” rule, you can practice more words, and they won’t notice if you make the card 4×4 for a shorter game.  Otherwise, lengthen your traditional row/column based game by making your board 7×7.)
  2. Surprise Words – Early readers are typically thrilled with their new ability, eager to display their prowess. I’ve had great success at encouraging their skill by leaving words around the house for them. A pair of words spelled on the fridge with their letter magnets has a seemingly irresistible pull, drawing the new reader over to puzzle out their meaning.
  3. Word Families – This was a little silly, but it was fun. I paged through some magazines and cut out people, arranging them into families of various sizes. I then glued each person onto an index card and wrote a simple word on each card. Each family had one word ending (or “rime”), so the kids could match the families based on which words rhymed. (Matching rimes rhyme!) For example, the “At” family had hat, cat, fat, bat, and sat in it. The “Ig” family consisted of pig, big, and wig. Matching the words to their families allowed the kids to see that words that were spelled the same often sounded the same and also allowed them to work on their fluency at reading common letter combinations.
  4. Name Match – Hunt around your house for a variety of small objects with easy-to-sound-out names: a cup, a hat, a pen, a doll, a toy dog or cat… Write the name of each object on a piece of paper, and see if your child can match the object to its name.
  5. Spelling Stories – This is a fun activity to do if you have letter blocks or magnets. I would start to tell the kids a story, stopping every sentence or two to spell out a new word for them to read. So, for example, a story might begin like this:

    Once upon a time there was a [spell out “cat” for child to read]. Now this [point to “cat” again] was a black-and-white stripey [point to “cat”] whose name was [spell out “Sam”]. One day our [cat] friend named [Sam] was going for a walk in his neighborhood. It was a lovely spring day, and he was enjoying the warm air and the smell of damp earth. Suddenly, in the middle of the sidewalk, [Sam] spied something. It was small and [spell out “red”].

    You get the idea. The more suspenseful or silly the story, the more eager your readers will be to participate, so keep the comedy going and the intrigue high!

  6. If you're not feeling artsy, use clipart and print your puzzles on cardstock.

    If you’re not feeling artsy, use clipart and print your puzzles on cardstock.

    Spelling Puzzles – I owe this idea to the authors of Reading Reflex, a book I happened to get from the library as my older kids were learning to read. They suggested creating word puzzles. I used blank index cards laid horizontally. I wrote each word, spacing the phonemes so they could be cut apart. On each card, I also had a picture to match the word. Then, I cut the card so the picture was on one slice, and each phoneme had its own slice. Using the picture as their clue, my kids were able to assemble the matching word by sounding it out. Be careful that your words are decodable for early readers! You can begin simply, with three-letter words, and progress to words with beginning and ending blends (like “clap” or even “plant”).

  7. Word Building Games – Drawn from a vaguely-remembered activity I assisted with as a fourth grade classroom aide during college, this word building helps kids to focus on each sound of a word. In order to play, you create a list of words that are all one letter different. Then, gather your necessary letters and tell your child the first word. After that, make sure they only change one letter—don’t let them build from scratch! Leaving the word intact forces kids to distinguish the precise difference from one word to the next. If you want to add difficulty, you can have them add a fourth letter to their words or change two letters at a time.
  8. Partner Reading – For early readers, the act of reading is exhausting. Each letter must be translated into a sound, each sound remembered as the next one is added, and the whole string of sounds blended together to create a meaningful word. That’s a lot of effort! For this reason, my early readers delighted in partner reading. As I read aloud to them, I would choose a word or two per page that could be easily decoded. Even contributing “and” or “it” to the story can be satisfying for newbies; as a child becomes a stronger reader, he can be in charge of every “the” in the story, or simply assigned to more and more words per page. This method also serves to eliminate the need for early-readers, which my kids (and I) found stilted and painfully boring.
  9. Add magnets to make this a fun fridge activity or take it on-the-go with a magnetic tray!

    Add magnets to make this a fun fridge activity or take it on-the-go with a magnetic tray!

    Spelling Cards – I made a series of cards with a picture on one side and a corresponding word on the back (on cardstock, so the word doesn’t show through!). My kids enjoyed trying to puzzle out how to spell each of the words with letter magnets, checking themselves by looking at the back of the card. Once again, I started with simple three-letter words and increased the difficulty as they became more adept.  I’ll have to see if I can find the file to upload for this one…

  10. Treasure Hunts – This was definitely a kid favorite—they still enjoy treasure hunts! If you haven’t ever done one, it’s simple: Select a treasure to hide. (Ours was often our afternoon snack, but anything will do.) Hide your treasure, and then hide a clue to finding the treasure. Hide another clue and another…and then give your child the last clue you write. So, for example, you give your child a clue that says, “On Sue’s bed.” On her bed, Sue finds a paper that says, “In the tub.” In the tub is a paper which says, “On the T.V.” There she finds a clue that reads, “In a pan.” Finally, she discovers her treat inside a pan in the kitchen cupboard. These are great for rainy days, especially if you make sure to keep the kids running to opposite sides of the house (or upstairs, then down, then back up) with their clues. As your kids get better at this, you can make more complicated clues or find more devious hiding spots to increase the challenge.
  11. Labels – As your reader gains more competence at sounding things out, you can increase their reading vocabulary and phonic knowledge by posting labels on things around your house. “Lamp” may be a fairly simple word to sound out, but lots of words—like “light” or “knife” or “coat”–can spark helpful conversations about how letters work together, giving your kids a boost into more complex phonics. Besides, the more words your child has puzzled out and sees regularly, the more words they will be able to read easily in stories.
  12. Internet Resources – The internet has a wealth of resources on every topic, but here are a few of my favorite freebies for use with kids at the beginning of their reading journey.
    • Starfall – While this website has a plethora of varied content (and at a surprisingly reasonable rate), the learn-to-read material is available for free. After you have mastered the individual letter sounds (doable via interactive animations and short games for each letter on one portion of the site), you can move on to the phonics section. There, short, animated phonics storybooks, games, and songs gradually teach more phonemes. These were too intense for my kids at the very beginning (Reading four words per page for five pages in a row!? Whew, exhausting!), but may work better for older (or more patient? More motivated?) readers. Even so, my kids enjoyed some of the more difficult stories once they were more competent readers, and they have silly seasonal stories with fun interactive features. In addition, the site has more content for kids who are at higher levels of reading competence.
    • Progressive Phonics – This website has dozens of truly silly leveled readers, available for free download. Begin with the Alphabetti books for a young reader still working to distinguish every letter, or start with the Phonics Beginner books if your child is already confident in all their letters and sounds. The best part of these books (besides the stories that will have your kids giggling) is the fact that they are made for partner reading, with kids reading only the big, red words on each page—perfect for beginners! Many of these books also have matching downloadable activities, if you’re looking to extend the lesson.
    • Teach Your Monster to Read – This super-cutely-animated website—free of charge via the Usborne Foundation—is perfect for your just-learning reader. Letter sounds are taught via games—your customized monster has to herd sheep into the correct pen or choose the correct letter for each sound to rescue the princess. From there, you move on to sounding out simple words. While the super-sensitive mouse in-game and the fact that each activity has to be repeated three times (with slight variation) to move on were initial deterrents, the gradual addition of more game options and the fun animations kept my kids going. One minor drawback here is the British accent of the narrator. This might cause confusion for some (For example, “o” ends up sounding more like “aw” than the American standard “ah”), but my kids adjusted okay. (Perhaps it’s because we’ve had to get used to wrapping our ears around southern accents!)