Family Book Club 2021-2022: Traveling Through World History

We continued our weekly family book club this year to keep exposing the kids to books they might not otherwise choose to read, and I once again worked to find books that (sort of) matched what we were studying in history and worked well for all three of my kids as far as interest/length/content were concerned. (This year they were in 7th, 6th, and 4th grades by age.)

This year we did a world history overview, so I tried to find books from all over the world in all different periods of history. I browsed book lists and read reviews and tried to find stories that were reasonably authentic and hadn’t aged poorly if they were older books. Some eras in history and parts of the world don’t have as many stories available, so that made for an interesting family conversation, as well. Since I had such a long list, a few of these turned into family read-alouds instead of book club books. Here are the books we read this year and our general opinion of them:

Continue reading

Hands-On History: Knights and Castles

We just finished an awesome six weeks of studying some really cool topics that my kids wanted to learn more about.  Today I thought I’d share the fun we had studying knights and castles.

Books were a big part of our study, though I tried to include as much hands-on as I possibly could.  (I’ll include a description of how we used the different books below for your perusal, along with a quick-reference list of all our resources at the end.  Our read-aloud stories–featuring King Arthur and Robin Hood–are listed and described at the very bottom of the post, below the reference list.) Continue reading

Earth’s Layers Cake: The Low-Tech, DIY Version

cake
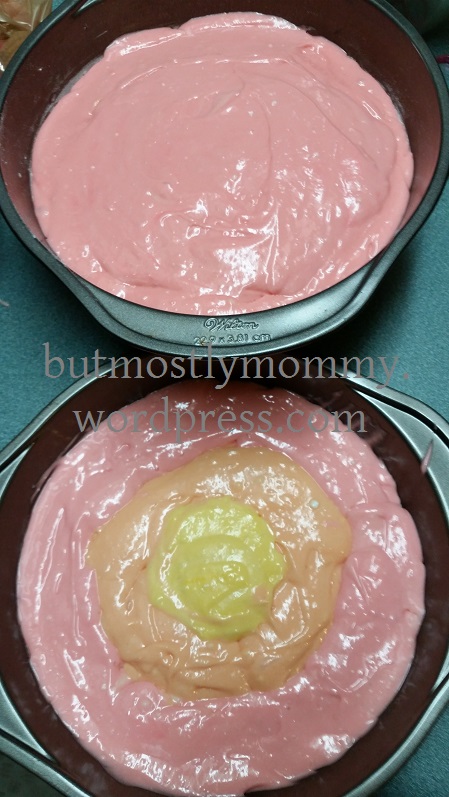
My kids wanted to study volcanoes.  I was totally uninspired by volcanoes, but I thought I’d run with it, perhaps expanding the study to include plate tectonics and the rock cycle so we’d have a bit more to talk about.  While I was searching for inspiration, I ran across the idea of having a cake to show Earth’s layers.  “Great!” thought I.  “Sign me up and show me how!”  (I’m a sucker for anything edible–particularly if it’s sweet!)  Unfortunately, everyone doing this project seemed to have round bakeware–cake pop molds of varying sizes, round-bottomed oven-safe mixing bowls.  Not I.  And, since I am disinclined to shell out that kind of money for the props to make one cool snack, I thought I’d look for my own way.

My creation doesn’t have perfectly-nested spheres (in fact, the outer core seems to spike into the mantle in a couple of places!), but it definitely has the layers, and–most important of all–it got the point across and thrilled my kids.  In case you want to try it, here’s what I did:

Supplies: White or yellow cake mix/recipe, chocolate frosting, white frosting, food coloring, multiple bowls for separating/mixing colors, two 8″ or 9″ round cake pans, large spoons, two cookie cutters (round is ideal–I didn’t have round), cake decorating set

1. I used a generic white cake mix (yellow would be fine, too–I use the yolks, so mine isn’t truly white).  After mixing the ingredients, I separated the mix into three bowls: a small one that I colored yellow, a medium one that I colored orange, and a large one that I colored reddish.  Make sure the mix is pretty colorful, since the color will be less concentrated once the cake poofs up during baking.  (Too much food coloring tastes bitter, though, so don’t go overboard.)

cake01

2. First, I placed a cookie cutter in the center of each pan.  The first one I filled with a dollop of yellow (inner core).  I spooned pink (mantle) around the edges of that pan and filled the space between with orange (outer core).  In the second pan, I filled the cookie cutter with orange (outer core–to cover the inner core from the first pan) and poured pink (mantle) all around it, reserving a small amount of the pink for the next step.


cake02

3. Then I removed the cookie cutters, covered the dollop of outer core in the second pan with a layer of mantle, and popped both pans in the oven.  (The first pan–with all three layers–had less batter, but both seemed to cook fine.)

cake03

4. When the cake was out of the oven and cool, I used a small amount of runny white frosting (I warmed mine to make it thinner) to glue the layers together.  The three-colored layer went on the bottom, capped by the layer that’s mostly mantle.  Make sure the little bit of outer core is on the bottom of the top layer–you wouldn’t want to have your mantle and outer core reversed!  Next, I used a very thin layer of chocolate frosting to represent the lithosphere.

cake04

5. This gray represented the solid rock of the crust.  I wanted to make it clear that even the oceans have crust beneath them.  Yes, I know the crust is included in the lithosphere, but the Red Cross/PBS material (more on that later) we’re using talks of them separately, so I just followed their lead.  I used really runny frosting so I could make a very thin layer.  (After all, this is already the second frosting layer, and I still had more to go!)  The generic brand frosting I use wins for runniness!  My gray, FYI, is made from a red/green mixture.  If I remember right, it was two red drops and three green.

cake05

6. Time to add the thicker continental crust parts and fill the oceans!  This time I thickened the frosting slightly with about a cup of confectioner’s sugar to the tub.  I wanted it just stiff enough to hold some texture, but still soft enough to spread in a thin layer.  Since we’re also studying the Middle Ages right now, I decided to do a rough map of Europe.  (Very rough.)  I rarely use the frosting tips as intended; I used the star tip loosely for a textured water look, but for the land I just did a rough outline with a tip and then spread the green around with my knife.)

cake06

The finished product!  Of course, you can’t really tell how many layers of frosting went into this (except when eating it!), but if the kids watch or help, they’ll get every detail of the process.  And the finished result was enough to spark their glee, so I’d consider this one a win!


experiential science: the chemistry of cooking

For whatever reason, for the past six months my kids have been utterly intrigued by baking.  Not only do they want to help bake, but they want to create their own recipes, as well.  Of course, their recipes always generate wet, gloppy, unappetizing messes.  So when I asked what they’d like to learn about, I was not especially surprised to hear “how to make a recipe” as a top choice.

While we could have merely gone the direction of baking lots of things and memorizing the types and proportions of ingredients, I thought I’d take a more scientific angle and come at the topic from the perspective of chemistry.  Because it’s alliterative, I liked calling this study The Chemistry of Cooking.

chemistryWe began at the very beginning, which has always been a notoriously good place to start.  In chemistry, the rational beginning place was the Periodic Table.  From Ellen McHenry’s The Elements, we learned about the elements, how they were discovered, how they are arranged on the Table, and what different element types are like.  Thrown in with this were some fun activities to help us learn the abbreviations for common elements, among other topics.

While we were learning about the Periodic Table, we thought it would be fun to memorize it.  This YouTube video from AsapSCIENCE helped us learn all of the elements in order–with the added benefit of including informational tidbits about the uses of many more common elements.  (We can sing the whole thing except a section at the very end–from Berkelium to Copernicium is so fast we haven’t yet managed to keep up without mumbling!)

If you want do dig deeper into studying the Periodic Table and the elements, consider The Mystery of the Periodic Table by Benjamin D. Wiker, which provides a more in-depth history of the development of the Periodic Table related in a conversational tone.  In addition–especially for kids old enough to understand the humor–Basher Science The Complete Periodic Table personifies each element to make it more memorable.  I put both of these aside until later, deciding that my kids would get more out of them in a few years.

chemistry2With a little bit of basic chemical understanding under our belts, we were ready to delve into the world of cooking.  For this portion of our endeavor, we used Edible Science: Experiments You Can Eat from National Geographic Kids, the American Chemical Society’s free Get Cooking with Chemistry PDF online, and  the downloadable manual for the Thames and Kosmos Candy Chemistry kit.  (We used our own supplies and thus didn’t need to buy the kit, but if you don’t have candy-making supplies, the kit may be handy.)  The kids loved making ricotta cheese, fizzy orange juice, ice cream, and various candies, among other things.  And with a newfound understanding of chemistry, much of what was happening made sense to them.

For older kids, Culinary Reactions: The Everyday Science of Cooking by Simon Quellen Field or What Einstein Told His Cook: Kitchen Science Explained by Robert L. Wolke were recommended to me (the second one several times).  I looked them over but decided to hold those until we come back for a second round of chemistry in some future year.

Now that we’ve wrapped up our chemistry unit, we need to figure out what we’re going to study next!

hands-on history/experiential science: dinosaurs

Out of the blue, the kids decided that dinosaurs sounded like a fun topic of study, so I dutifully planned to incorporate a dino study in our next six-week block.  (We have taken to block scheduling in six-week increments, and it’s glorious!)  I had a little more trouble with the “hands-on” and “experiential” portion of this study, but I did my best!

Background: Fossils and Paleontology

Fossil

Our finished product left us with both an artifact and its imprint.

To begin our study of dinosaurs, I wanted to provide a little background information on fossils and paleontology.  I began our study with these three activities, which I did on three separate days.  The book Fossils Tell of Long Ago (Aliki) provided a snuggly way to reinforce the hands-on learning.

  1. Discovering Fossils – This first activity requires a bit of advance preparation.  Select a small object to be your “fossil” and wrap it inside a small lump of air-dry clay.  I chose a coin, since I figured it wouldn’t break and cause dismay if my kids accidentally chipped away at their clay with too much vigor.  Make sure your air-dry clay lump is not too big or it will take an eternity to dry and/or crack open as it dries.  Mine was fine within 12 hours, but I kept it small.  (I’ve also seen this activity done by coating objects with petroleum jelly and using plaster of Paris to bury them, but I already had clay on-hand.)  When you’re ready for your activity, provide your kids with a few different tools to uncover their fossil.  We used small screwdrivers for the grunt work and paintbrushes for the final dusting.
  2. Fossil Imprints – Often what paleontologists find is what ISN’T there.  We happen to have some bathroom tiles with impressions of various leaves stamped into them, which we used to discuss fossil imprints.  We also have a local park at which the planners thought they would cleverly imprint various animal tracks in the wet cement (except that at times you can see the marks of the tool they used to roll on those tracks…).  Both these and some PlayDoh fun allowed us to see what sorts of imprints plants and animals might have left behind.

    Paleontology

    This small paleontologist tries to identify a fossil to assemble his skeleton.

  3. Assembling Fossils – Well, your little paleontologists have discovered some fossils–now what?  Using some little dino skeleton kits from the dollar store, we pieced together a couple dino skeletons.  We discovered that even with instructions this is pretty hard work because many of the pieces look alike.  It’s hard to imagine how real paleontologists can take the few bits they find and determine what pieces they are and what type of dino they belonged to!

Dino Basics

  1. Introductory Reading – Once we had some background knowledge, it was time to introduce some basic information about dinosaurs.  We read both the picture book Magic School Bus: In the Time of the Dinosaurs (Cole) and Magic School Bus (Chapter Book #9): Dinosaur Detectives, but much of the information is redundant so you could easily choose either one or the other.

    DinoCharts

    We posted our charts and some of the kids’ creations on a wall.

  2. Dino Periods: A Quick Research Chart – Did you know that the “time of the dinosaurs” was actually divided into three distinct periods?  Not all the dinos you’ve seen on T-shirts were alive at the same time, and the world was a vastly different place from the beginning to the end of the era.  We checked out the book When Dinos Dawned, Mammals Got Munched, and Pterosaurs Took Flight: A Cartoon Prehistory of Life in the Triassic (Bonner) to give us a glimpse of the vast amount of time we were studying by taking on the topic of dinosaurs.  While some of this probably went right over their heads, it had a LOT of information on the Triassic Period presented in humorous text and delightful cartoons.
    If we had been doing a more in-depth study, I likely would have studied each period on its own.  As it was, I knew we were just planning a brief overview.  So our next step was to compare the periods and make generalizations about their climate and vegetation, as well as noting which types of dinosaurs lived in each period.  I handed the kids a few books with each period marked and had them read and look for facts about each era, which I then copied onto a chart.  They were surprisingly enthusiastic about this project and were delighted to admire the results of their “research”.  (See our resource list below for book ideas.)
  3. Overview: Oral Reading and Notetaking – Next we began a more thorough overview of the actual dinosaurs.  For this, I chose to have the kids read the Magic Treehouse Research Guide #1: Dinosaurs (Osborne).  They took turns reading chapters aloud over the course of several days, and as we made our way through the book, I suggested that each of them take notes on things they found interesting.  Goobie chose to illustrate her observations, while Peatie preferred to make long lists of facts.
    • Dino Eggsperiment – In the course of our reading, we stumbled across a few interesting tidbits about dinosaur eggs.  For one, they were probably a little spongy like reptile eggs, so they wouldn’t break when they were laid.  (Some eggs have been found in a row, so some dinosaurs may have laid eggs as they walked!)  We used a chicken egg compared to a playground ball to visualize this difference and the reason behind it.  (What would happen if you dropped each from a foot or three off the ground?  Try it!  Which one would a baby dinosaur need to be inside to survive?)
    • Dino Eggsperiment, Part 2 – Additionally, paleontologists believe that the biggest dinosaur eggs would have been no larger than about 10 inches, or roughly football-sized.  Why?  Because the bigger the egg, the thicker the shell would need to be to support it, and they figure a baby dino couldn’t have broken out of an egg larger than that.  We used clay (PlayDoh would also work) to help kids visualize the thickness vs. size comparison.  You can make a small cup shape with very thin sides, but if you try to make a bigger cup with thin sides, it will collapse.  Have them use toy dinos to try to break through a thin-sided cup and a thick-sided cup.  What’s the difference?

Digging Deeper

  1. Organizing Information: Dino Cards – Now that we had a basic overview of the Age of Dinosaurs and some knowledge of dinosaurs themselves, it was time to dig in a little more.  Using our various books, we took a couple days to search for more information on the dinosaurs we had taken notes about during our reading–and discovered a few other interesting ones along the way.  We made a notecard for each dinosaur, listing the period in which it lived, the family it was part of, its size, what it ate, and any other interesting tidbits we learned.
  2. Herbivores vs. Carnivores: A Comparison Chart – It was time for a new chart.  This time, we compared meat-eating dinosaurs with plant-eating dinosaurs, using our various books to check what we thought we knew about each variety before writing the facts on our chart.
  3. Dino Reports – Each of the kids chose their favorite dinosaur to write a brief report on.  Using the facts we’d listed on our cards, they crafted a paragraph about their dinosaur of choice.  I loved how each kid’s paragraph showed which bits of information they valued and really incorporated their voice into the telling of the facts.  Having already collected facts together, the kids merely had to select which ones to include, choose a logical order, and turn the bullet points on the card into full sentences.  Actually, this was rather like the IEW (the Institute for Excellence in Writing) method.
  4. Dino Measuring – Finally, we took a handful of our dinosaur cards and set about measuring the relative sizes of the dinosaurs.  We happen to have a nearly straight shot from one end of our house to the other, so we were able to measure from the front door and place labeled painter’s tape to mark the lengths of the various dinos.  (Though we couldn’t fit a Diplodocus!)  Then we hung the matching dino card on the wall beside the tape mark.

DinoTour

A measurement marker is visible on the floor, while our display wall marks the end of the dino measurement walk.

The Big Finish: Dino Tour

For our grand finale, we invited Daddy and Grandma and Grandpa to see what we’d learned about dinosaurs.  (This was the kids’ idea!)  The kids started at the front door and showed them our dinosaur measurements and dino fact cards (making sure everyone noticed the most interesting facts), pointed out our comparison charts and a few assorted other creations hung on the wall, and topped off the tour by reading their reports.  They were so proud of themselves, and the grown-ups got to share a little of that joy and learn a little something new.

Resources:

  • Fossils Tell of Long Ago (Aliki) – A good early-elementary picture book on what fossils are and what we can learn from them.
  • Magic School Bus: In the Time of the Dinosaurs, Magic School Bus (Chapter Book #9): Dinosaur Detectives – The facts in these are, of course, more like accessories to the story, but they are a nice, gentle way of introducing some basics.
  • When Dinos Dawned, Mammals Got Munched, and Pterosaurs Took Flight: A Cartoon Prehistory of Life in the Triassic (Bonner)- This included way more info than we could really process in the single day we gave it, but it’s a brilliant mix of humor and information that was fun to read.
  • Magic Treehouse Research Guide #1: Dinosaurs (Osborne)
  • ‘Love’s ancient copy of Dinosaurs and Other Prehistoric Reptiles (A Giant Golden Book by Watson) – While this had a LOT of text and not many pictures (though it certainly made sure to have realistic gore), we did skim some of the surprisingly-conversational information contained in it.
  • The Children’s Dinosaur Encyclopedia (New Burlington Books, Consultant Prof. Michael J. Benton) – This one had dinos organized by family with facts about the family and then details about each dinosaur.  It was pretty cool!
  • Dinosaur (DK: Eye Wonder) – This is a great book for early elementary because the text is large, the reading level is pretty simple, and there’s not too much text per page.
  • Walking with Dinosaurs: A Natural History (Haines) – This one was more texty than we needed, but the photo-realistic images of dinosaurs in their likely habitats were really cool to look through!
  • The Usborne Internet-Linked Encyclopedia of World History (p. 42-59) – I was surprised to find several pages devoted to dinos in here, and the information was actually pretty nicely compact and easy to comprehend.

the domino effect of reading

Through the years, I can’t count the number of times when “I read it somewhere” was the only answer I had to give others who wondered where I’d learned things.

Though I’m not sure exactly when it began, somewhere during elementary school I became a voracious reader.  At one point I remember being frustrated with our town library because I had read any chapter books in the kids’ section that I found remotely interesting (that being a majority of them), and there was nothing new to read.  So the notion of soaking up information through books is nothing new to me.

And yet, sometimes I am still surprised at the ways in which reading connects to other areas of learning. I was reminded yet again this week of the truly interconnected nature of skill-development.

After hovering forever around the A to Z Mysteries and Boxcar Children level of books (for something like a year!), Peatie has FINALLY increased the difficulty/reading level in what he selects to read during his evening free-reading time, and I’m in my glory.  Why?  There are lots of reasons to rejoice, but here are a few:

A) Because he’s as excited about reading these books as he was about the first A to Z and Boxcar books.  (After the first few, it seemed like he read more of the same just because of momentum.)  He now comes dancing out of his room every evening to report on the latest happenings at Castle Glower.

B) Because he also pokes his head out every evening to ask me a vocab word or two.  He now knows about crenelations and retorts and griffins and privy chambers and any number of other glorious words.  Have I mentioned how much I love words?

C) Because he’s incorporating the tone and vocabulary of the book into his conversation at times, which I think is awesome.  The other night he was reporting in on the relative ages of the various characters when he informed me (with a smug smirk), “I don’t know Bran’s age, but I do know one thing for certain–he’s a wizard!”  The deliberate pace, the turn of phrase, and the pregnant pause were perfect, and he knew it.

D) Because even his writing is improving.  The story he started today sounded vastly more interesting and stylistically mature than what he’s written in the past.

A story he wrote a month ago started like this: “One time a bear lived in a tree. His name was Zub. He loved being up the tree, but suddenly Zub saw a hunter trying to get him! The hunter started racing up the tall tree. Zub raced into the high branches.”

His latest story begins, “The wonders of the different worlds spread across the worlds fast. Heartland (a world) had many towns, and one of them was Size (Named because it was HUGE)! In the town of Size the houses are small, and they have many stairs. In Rattle the Rat’s house the shows on TV were always watched on the 2594th floor.  (Now we can’t go over what all his house was like, because it has 10000 levels.) So he was watching a show when he heard a sound.”

Earth-shatteringly brilliant writing?  No, but in my opinion there’s definitely noticeable improvement, and I’m excited for him.  (And for myself.  His stories before were all rather formulaic, insanely improbable, and hard to follow–and I had to read them all.)

All these delightful effects (and more that I haven’t noticed, I’m sure!) come because he’s now read a couple more challenging books.

Isn’t it fun to watch your kids learn and grow, making connections and getting excited about new information and improving their skills!?  I can’t wait to see what he learns next!  I love this job!  (Well, most of the time…)

**In case you’re wondering, he’s currently working through Jessica Day George’s Tuesdays at the Castle series.

15—or maybe 19…or 26—chapter book series to get you through the early years

So your child is reading—glorious! I’m sure you’re ecstatic. And you’ve slogged through the painful sounding-out-every-word phase, endured the agonizing repetitions of early reader books, and coasted in the golden waters of simple picture books. But now your little reader has really begun to take off. Either he’s begun demanding to read chapter books like some of the older kids he knows, or she’s gobbling through picture books so fast that you’ve worn out your library card. One way or the other, you’re venturing into the world of beginning chapter books.

Make no mistake—this road is not an easy one, either. If you’re like me, you’re pretty picky about what your precious little sweeties read: nothing too scary or gory, and I’d like the characters in the books to be generally likeable and preferably not sassy to their parents or unkind to each other. Even if you’re not as paranoid as I am, you’ll soon realize that while chapter books take your kids longer to read than picture books, they still don’t take that long. And then you need another one. And another one. And it’s not always easy to find something your child wants to read.

With picture books, the options seemed endless: take home a super-sized stack, and fully half of them would be appealing enough for your child to survive through 32 short pages. With chapter books, you may find that you soon gravitate toward books in a series. After all, it’s taken you eleven attempts to find a book that Junior likes beyond the first chapter. The others were too long or too short or had a bland cover or didn’t have an interesting first chapter or had too-small font or not enough pictures or too many pictures or too many animals or not enough animals or…. Having finally found something he enjoys, do you really want to go through the whole process again to find another one he’ll read?

Having slogged through this era myself—and finally getting one child to branch into longer, harder books while the second child loops back to re-read every picture book we own and each chapter book she has already enjoyed while building stamina for things with more pages and smaller fonts (and don’t even get me started on the third child, who has spent the last nine months stagnant in the sounding-things-out phase)—I thought I’d share the journey in the hope that it makes someone else’s life simpler.

Below you’ll find a chart illustrating the reading level range of each book series we’ve read (and some shoot-offs that I found out about as I was trying to chart the main ones we had read). The reading levels listed are the grade-level equivalents given by Scholastic’s Book Wizard; these are not necessarily the same as the AR level or any other level someone invented. (There seem to be at least three dozen ways to level books; I had to pick some way to sort this, and the Book Wizard sure is handy.) If the reading level of a series is mostly focused in a narrow range despite some outliers, then I have made that focus-range darker than the rest of the bar. I’ve also included very loose genre categorizations for each series, with A being a general adventure-type book, M being a mystery series, AN being an adventure series with a nonfiction element, and N being nonfiction.

Under the chart, you’ll find a quick summary of each series (in ABC order, to make life simple, with author’s last name referenced parenthetically after the series title) along with any information I thought might be pertinent or helpful. Beneath that, I’ve included a list of book series about which I have heard good things but haven’t actually had in my home—in case you need still more fodder. Obviously, you’ll want to be sure any books your kids read are a good fit for your own family’s values.

Handy Chart o’ Chapter Books for Reading Levels/Grade Levels 1-4ishEarlyChapterBooks

  • A to Z Mysteries (Roy): Dink, Josh, and Ruth Rose—the older siblings of the protagonists in the Calendar Mysteries—always manage to get to the bottom of tough situations in order to help folks in their town. Though I was skeptical of some of the titles since my kids are pretty sensitive, the series handles even ghosts and zombies in a manner that was not frightening. (Spoiler: It’s always someone dressed up who’s trying to scare others away for some reason.) These books are just slightly longer than those in their siblings’ series and can be read in any order. My son’s favorite feature was the included map of their town, which allowed him to track the kids’ every move!
  • Andrew Lost (Greenburg): A 10-year-old boy gets sucked into his atom-shrinker invention along with his cousin Judy. They end up going all kinds of crazy places—beginning with the inside of a dog’s nose—learning about them from Andrew’s tiny robot friend as they go. My nonfiction-loving son was fond of these.
  • Boxcar Children (Warner): Four children whose parents have died (off-camera and completely un-distressingly) decide to strike out on their own rather than risk being split up or sent to live with an unknown grandfather. The first book is an adventure, while the subsequent books in the incredibly-long series are all mysteries. There’s also a secondary series, The Adventures of Benny and Watch, which has a bit lower reading level, ranging from 2.3-3.6, though only one is above 3.2.
  • Calendar Mysteries (Roy): Bradley, Brian, Nate, and Lucy—all first graders at the start of this series—untangle a variety of mysterious happenings around town in these innocuous little chapter books. Surprisingly, there are 13 stand-alone books in this series—one for each month, and a final one with a New Year’s Eve theme.
  • Clifford Chapter Books (Scholastic): Great for early readers, these books have big text and an image on almost every page. While the guidelines say ages 7-10, I don’t know any 10-year-old who wants to be caught reading Clifford; on the other hand, these were perfect for my preschoolers who were reading at this level.
  • Flat Stanley (Brown): This one is tough because there are three different groups of books going by the same series name: there’s the original series, the Worldwide Adventures, and the I Can Read books. The original six-book series, in which Stanley not only becomes flat but also turns invisible and has a variety of other (very unlikely, as my son points out) adventures, is pretty solidly a 3rd grade reading level, split between early- and late-3rd grade. The Worldwide Adventures series, featuring about a dozen more stories in which Stanley visits famous locations around the globe, is mostly in the upper-3rd to lower-4th grade range (though there’s one upper-second and one lower-5th book in there…), while the I Can Read (Level 2) books range from early 1st to late 2nd.
  • Fly Guy (Arnold): These silly stories follow the adventures of a boy named Buzz and his brilliant pet, Fly Guy. While it’s a stretch to call them chapter books—each page of the extremely short chapters features a large image and only a sentence or two of text in large, cartoony print—they do contain chapter headings, and the subject matter will appeal to even older readers. I didn’t love all of the subject matter, but many of them were great. There is now a sub-series called “Fly Guy Presents…” which are humorous informational books.
  • Jigsaw Jones Mysteries (Preller): Seven-year-old Theodore Jones—better known as Jigsaw—has a talent for solving mysteries. All of his friends ask for his help whenever there’s something they can’t figure out, and he and his friend Mila work together to solve the cases. A couple dozen titles will keep your kids busy testing their wits on these mysteries.
  • The Littles (Peterson): The Littles, a family of tiny people-with-tails who live hidden in the home of a normal-sized, tail-less family, have to be inventive to meet their needs, and their tiny lives are full of adventures. There are two groups of books here, the original dozen or so Littles titles, which are mostly early-to-mid 3rd grade level, and then a handful of the Littles First Readers, which are almost exclusively level 2.1.
  • Magic Tree House (Osborne): As you likely know, there are about a zillion of these books about Jack and Annie and their travels through time in the Magic Tree House; many kids tire of the plot formula after a while, but my daughter was happy to read every one she could get her hands on—and then go back and read them all over again. I have to admit, though, that I’ve been delighted at the tidbits of history she’s retained from these and brought up at random moments. It’s best to read at least the first few in order; the stories do build on one another (referring to previous events, especially within each multi-book mission), but it’s not a big deal to jump around, either. The later books tend to be a bit higher reading level, though this is not universally true. The companion nonfiction research guides vary widely as to reading level, with the early ones being about as hard as the books they’re written to accompany, and many of the Fact Trackers being 4th or 5th grade reading level.
  • Magic School Bus Chapter Books (Scholastic): Like the videos and picture book series, these twenty stories feature Ms. Frizzle’s class going on field trips in their Magic School Bus. The characters and general plot-style are the same; these are just more text-heavy. My nonfiction-loving son enjoyed plowing through these and learned a surprising amount.
  • Marvin Redpost (Sachar): Third grader Marvin Redpost struggles with the typical kid issues, from wonderings about his place in his family to accusations of nose-picking to ill-advised feats of bravery.
  • Mercy Watson (DiCamillo): This super-silly series about a pig named Mercy who thinks she ought to be human features a nice, big font and colorful, hilarious pictures on nearly every spread.
  • Mr. Putter and Tabby (Rylant): A quirky retiree and his cat bumble through a variety of everyday adventures like dancing, racing, and baking. My daughter was charmed by his antics. Oddly, the series is mostly either 2.1-2.2 level books or 2.9 level books.
  • Wayside School (Sachar): The setting for these books is the top floor of Wayside School, which was supposed to be one long hallway with thirty classrooms but instead was built with 30 stories, each containing only one classroom. Sachar pulls out all the stops in these books, coming up with the zaniest scenarios that leave kids in fits of giggles.  This one can be a little dark, though, so you may want to take care with these.  For example, the first chapter of the first book features a teacher who turns children into apples–and then accidentally turns herself into an apple and gets eaten by the janitor.

This is obviously not an exhaustive list of chapter book options in this reading range; it is merely the list of chapter books that my kids have enjoyed. Though I hesitate to advocate for series with which I have no experience, I will provide a list of other options that I’ve heard recommended on numerous occasions but for one reason or another my kids didn’t get around to reading:

  • The Kingdom of Wrenly (Quinn): The protagonists of this one are an eight-year-old prince and his friend, the seamstress’ daughter. Though these aren’t carried by Scholastic (and thus don’t have a reading level listed there), the Lexile system places them roughly on-level with the upper Magic Tree House or lower Magic School Bus books; I’m guessing around 3rd grade-level. I did see one of these, though, and it has a huge font and numerous illustrations, which means I ought to pick it up to expand the repertoire of my small-text-averse daughter. **Edit: My daughter LOVED these books, devouring each one of the seven we got several times over the course of two weeks.  Pookie was enthralled by her enthusiastic descriptions and had me read them aloud to him.  While I didn’t find them gripping, the stories have positive messages and laudable protagonists, and the pictures on every page are nicely done.
  • Rainbow Fairies (“Meadows”): These seem to be pretty narrowly in the 2.7-2.9 range and strongly appeal to kids who enjoy magic, with female fairies for protagonists. My sister said she was surprised that these weren’t as cheesy as she expected. Upon some investigation, there seem to be more fairy books after the seven rainbow colors—Weather Fairies, Dance Fairies, Fashion Fairies, Animal Rescue Fairies…. **Edit: My daughter suddenly got into fairy books and read–I kid you not–somewhere in the neighborhood of 90 of these within the span of a couple months.  I found them predictable, but there was really nothing objectionable about them.
  • Pony Pals (Betancourt): For the horse-lovers among us, there are several dozen of these books ranging pretty evenly from 3.1-3.9 and featuring female pony-lovers and their horse-themed escapades.
  • Secrets of Droon (Abbott): Though I’ve heard of these, I’ve somehow never run across them. There are a couple dozen of these stories, though, which feature magic and are mostly early-third-grade level.
  • Geronimo Stilton (Piemme/Scholastic): These heavily-illustrated books featuring mouse characters appeal to those who love comic books because of their frequent use of fun fonts and small images in the text. They range widely from early-second- to early-fourth-grade level.
  • Cynthia Rylant has written several series for young readers, including Mr. Putter and Tabby (listed above), a second-grade-level series about a pig called Poppleton, and the third-grade-level Lighthouse Family series.

Hopefully this list will give you enough fodder to keep your voracious little reader going for a while…until she’s ready for some longer chapter books.  Perhaps I’ll have to make a list of those next.

experiential science: solutions and crystallization

We’re studying science through Bernard Nebel’s Building Foundations of Scientific Understanding (often simply referred to as BFSU), which is a delightful program.  We’re still working through the first book, intended for grades K-2.  Nebel walks through each topic, explaining concepts and terminology to the instructor, giving guidelines for sharing the material with students (mostly through Socratic discussion), and providing a list of useful books.  Lessons are not strictly linear, but weave between the branches of science and can be arranged as best suits the learners–though Nebel explains that certain concepts must be understood before others can be introduced. The only lack in Nebel’s material, in my opinion, is its minimal use of hands-on exploration.  While most concepts are introduced with a demonstration, they are often developed verbally.

My kids LOVE science, but when they think science, they think messy and playful. So instead of trying to look elsewhere for curriculum, I decided to build on the awesome foundation provided by BFSU by doing quick searches for hands-on ways for my kids to experience the concepts.  I thought I’d share my results here.

Though I’ve been doing this for a while, it just now occurred to me to share my work, so I’ll start with one of our recent units: solutions and crystallization.  The activities and our discussions were based on Lesson A-9 in the first BFSU book.  You can read for yourself to glean discussion points, but I’ve listed my activities below.

mixorsolution
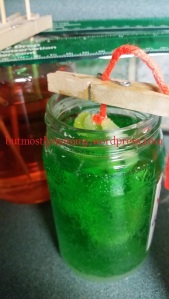
Activity 1: Mixture or Solution?

First we had to determine the difference between a simple mixture (which we’d already discussed) and a solution.  I’ll list my supplies below, but don’t feel bound by what I used–I just chose what I had on hand.  Nebel describes a simpler form of this activity in his book.

  • Supplies: clear containers, water, stirrers, various substances for mixing
  • Gather a variety of similar-looking substances.  I chose sugar, salt, flour, bread crumbs, vanilla, and sand.  (I also had oil on hand for the oil/water/soap experiment that Nebel describes.  I won’t bother to replicate it here, since it’s in the book.)
  • Assemble one small container of water (preferably a clear container) and a stirring implement (I used toothpicks) for each of your substances.
  • Have your kids stir a small amount of each substance into one of the containers.  What do they notice? Do some behave differently than others?

Activity 2: Crystallization

We did two separate crystallization activities in one fell swoop: Borax and rock candy.

  • Designer Crystals (Requires pipe cleaner, Borax, water, jar, string, stick)
    • Using a pipe cleaner (or two!) let your children form a design on which to grow crystals.  They can make a letter, their name in cursive, or simply some squiggles, but be sure the design can be lowered into your chosen jar (and lifted out again!) without touching the sides or the mouth of the jar.  You’ll need a bit of extra room to get it out once it’s laden with crystals.
    • Tie your pipe cleaner to a string and your string to a stick.  You’ll balance the stick across the mouth of the jar and the string will dangle your design into the water.  Be sure your design will be completely submerged but NOT touching the bottom or sides of the jar–leave at least a half-inch clearance, if not more.
    • Measure how much water it will take to fill your jar, and heat that amount of water.  You can do this via the stovetop or a microwave.
    • Once your water is hot, stir in a generous helping of Borax powder.  Different people recommend different amounts, but this experiment doesn’t seem too fussy.  I accidentally got two batches with different amounts, and both worked fine.  The idea is to super-saturate your liquid.
    • At this point you can add food coloring if you’d like, but the color of your pipe cleaner seems to be more powerful than the color of the crystals.  Wait for your solution to cool before pouring it into the jar (or before handling the jar, if you opted to microwave it).
    • Dangle your design in the jar of Borax water and set it aside where it won’t be disturbed.  Our designs were heavily covered with crystals within hours, to the point where I had to pry them from the bottom with a knife.  The results were pretty exciting!
  • Edible Crystals (Requires skewer, sugar, water, jar, springy clothespin, rulers)

    crystals

    Borax (foreground, already finished) and rock candy (background, looking like nothing yet)

    • Measure your skewer and clip a clothespin on it so it will balance on the mouth of your jar and dangle inside without touching the sides or bottom of the jar.  If you need to, use rulers to make the mouth of your jar more narrow so the clothespin can balance.
    • Measure how much water you need to fill your jar.  Pour this into a saucepan and heat it.  Keeping your water just below boiling, begin to add sugar at a rate of about a half-cup at a time.  I’ve read that you need about 3 times as much sugar as water; I forgot to measure, but I know I used waaay more sugar than I thought I would and had to stir way longer that I thought I should to see if it would dissolve.  (The kids got bored and wandered off.)  By the time my liquid was super-saturated, the top seemed to get cloudy and not clear up even after I stopped stirring and let it settle some.
    • Let your liquid cool until it’s easy to handle.  (Otherwise at the very least you risk burning your hand while handling your jar!)  Pour it into your jar, being careful not to pour any undissolved crystals of sugar into the jar.  (Rock candy is easiest to eat on a stick, not stuck to the bottom of a jar.)  You can add food coloring if you’d like.
    • Balance your skewers atop the jar and be prepared to wait at least a day before seeing any difference at all and a week or more before you have something worth chewing on.  Some people say this process can be sped up by dipping the skewers into the solution, rolling them in sugar, and letting that coating dry before dangling them.

Activity 3: Solar Still

I like to have a “so now what” type of moment about the things we learn.  So how can we use our knowledge of solutions?  I posed a real question to my kids: Suppose you were stuck on a boat in the ocean and you ran out of water.  You know that salt water will kill you.  How can you get fresh water other than waiting for rain?  I could have let them develop the whole thing on their own, but once they had the concept I put together a solar still and had them figure out how it worked.

  • Supplies: salt, water, large bowl, glass or heavy container that fits inside bowl and is shorter, plastic wrap, rock
  • Mix some saltwater in the bottom of your large bowl.  Taste it if you’d like.
  • Place your glass in the middle of the saltwater.  It has to be a glass or something heavy, otherwise it’ll float around or tip and ruin the experiment.
  • Cover the bowl with plastic wrap, ensuring that it is tightly sealed around the edges.
  • Place the rock on top of the plastic wrap, centering it over your empty glass and making sure it slightly depresses the wrap.
  • Put your still in a warm place and wait for the results.  Alternately, you could speed up the natural process by using warm water that will already be evaporating reasonably fast.

why homeschooling is a horrible idea

So you’re thinking about homeschooling your kids, eh?  I do that (much as I hate to admit it).  My kids are still young, but I feel like I’ve got just enough experience to give you some warnings.  If you want the awful truth about homeschooling, you’ve found the right blog.

Homeschooling is hard.  Your kids are with you pretty much 24/7.  Any errands you need to do, any doctors’ appointments you’ve got, any cleaning you need to accomplish, anything at all you want to do–they’re there.

Now, you may be thinking, “I’m a stay-at-home mom anyhow–how is this any different than having a toddler underfoot constantly?”  There are a few differences.  For one, your toddler likely takes naps.  Ah, those blissful hour-or-more periods of afternoon freedom!  During naptime, I was able to do a bit of cleaning each day and STILL have some time for puttering online.  I had a bit of much-needed quiet.  I could use the bathroom without someone shouting at me through the door–or simply barging in.

As your children get older, they stop needing naps.  You can try to enforce a daily quiet time, as some do; I waved the white flag on that one because my oldest kept eagerly calling out during his quiet time, wanting to show me his Duplo creations or explain the nest he was building.  (And could YOU look into those sparkling eyes and tell him that Mommy just wants to be alone and QUIT calling me to share your masterpieces?  I thought not.)

So.  You have children around the house who no longer nap.  They don’t DO quiet.  They are getting older, and are thus acquiring the dreaded Toys of Many Pieces.  You thought it was awful to have rattles and toys-with-many-balls littering your living room?  Now try millions of tiny, razor-sharp Legos scattered across the floor studded with those giant plastic nails brought to you by the makers of Sorry!, a sprinkling of stray perler beads, and a few quadzillion Calico Critter-sized muffins.  These pieces never really get put away because, frankly, your children never really get put away, and where they are, there are their toys.  You try to limit said toys to one room of the house, hoping to contain the insanity, but somehow they begin to colonize and you find yourself stepping on teeny toy pieces in the kitchen, the hallway, the bathroom–your feet are doomed.

See the clutter all over the table?  That's what my whole house looks like--our stuff seems to leak out over every surface no matter how often I purge and de-clutter.  And see the water all over the floor?  This is my kids cleaning.  Even cleaning isn't clean with your kids around all the time.

See the clutter all over the table? That’s what my whole house looks like–our stuff seems to leak out over every surface no matter how often I purge and de-clutter. And see the water all over the floor? This is my kids cleaning. Even cleaning isn’t clean with your kids around all the time.

Moving on.  You have children who no longer nap, don’t do quiet, and have fallen in love only with foot-assailing, million-pieced toys.  Everyone assumes said children must be gone at school for the day, since any sane person would want a break from them.  Your doctor offers daytime appointments, your church offers daytime women’s programming, your new acquaintances suggest daytime coffee-dates.  Everyone expects you to haul along your nursing infant (or not, if you’ve got faulty equipment like mine) or chubby-cheeked toddler.  No one quite knows what to do with your gangly six-year-old–or, heaven help you, your even ganglier eleven-year-old.  And let’s not even get into the money you could be earning, rather than spending, with a lovely part-time job.  (Sure, you could get an evening-and-weekend gig, but then when would you do your lesson planning, much less enjoy a moment of much-needed peace during the time your spouse is around to wrangle the crew?)

When you send your children to school for the day, they are not with you.  This seems obvious, but think of the implications: it’s hard to get annoyed with someone who’s not with you.  You can’t possibly need a break from someone who is not there.  Do you see where I’m going with this?  It’s mutual, you know.  You may get tired of having your children constantly NEEDing you–but they get rather tired of always being under your eye, as well.  And let’s not even get started on how they interact with each other.  Those who go to school might take out their pent-up angst on their siblings at the end of the day, but those who aren’t in school have no time limit on the release of said angst, nor do they ever have a break from their siblings’ annoying habits.

When you send your children to school for the day, they are not at home.  Again, this seems obvious, but let’s look at the implications:  you can’t possibly make a mess of a place where you are not.  You can’t possibly get tired of a place you’re not at.  When your children go to school, they leave the house and go somewhere else.  They spend a majority of their waking hours there, making a mess of someone else’s space and hanging out in spacious rooms with schooly decor.  If you homeschool your children, they spend an awful lot of time at home, looking at the same walls and making messes with the same toys.  (My sister’s house sure got cleaner after she sent her kids to school!)  Sometimes the whole lot of you feel rather cabin-fever-y.

And that doesn’t even get into the issue of being the sole educational authority in your children’s lives.  If you tell them that New Mexico is a separate country, they may have no one to set them straight for a decade or more.  Unless you are in a state with strict homeschooling regulations, YOU are the one who chooses what your child will learn, when they will do the learning, and through what means.  Have you looked at the myriad curricula available?  Pick one subject, and you could likely spend months of evenings researching curricula without even getting to all of them.  Even if your kids did stop napping before they reached school age, you didn’t have this time-consuming monstrosity of plotting, planning, researching, and bargain-shopping hanging over your evening free time.  And then consider the effort of planning out said curricula and making sure it gets learned.  At school kids have the weight of peer pressure and non-family-adult authority to keep them plodding away at even the things they don’t love.  At home, they find it far too easy to whine at the teacher, try various avoidance techniques for subjects they don’t enjoy, burst into tears when something isn’t instantly understood…  Perhaps the latter is a good thing for them, reducing their stress by allowing emotional release; it certainly is NOT a pleasant stress-reducer for me.

Do you want your children to be exposed to art, music, and athletics?  Welcome to additional teaching or additional expenses.  Hoping your children don’t become hermits, but are exposed to a variety of different people and have the opportunity to form lasting friendships?  Unless you happen to be in a kid-populated neighborhood, you’ll have a grand ol’ time hauling your kids to extracurricular activities, haunting the park hoping to find playmates, and trying one homeschool group after another–each more expensive than the last.

Do you have multiple children?  If so, you have multiplied your problems.  What if one of the curricula you have agonizingly chosen and spent precious money on is perfect for one child, but a horrible fit for the next?  What do you do with your other children while one of them is having one-on-one instruction?  How do you find opportunities for each of your children to develop their separate talents and interests and establish an individual identity and some friends of their own, all whilst hauling the whole lot of them along everywhere you go?

All these dilemmas–and more–await the lucky parent who chooses to homeschool their brood.  And yet…  And yet, though I did look up public school registration information and think of how simple it would be just to sign us up and send my kids off to school, I never seriously considered doing so.  It’s not that I’m snobbish and look down on public school or wish to keep my children away from others, it’s just that I love the life I am able to forge for my kids as a homeschooling family, despite the difficulties and frustrations.  More on that to come.

30 pre-reading activities for young children

Encouraging your child in their love of letters?  Wanting to make sure your child has the tools they’ll need to learn to read?  These activities are a great way to start!  I’ve divided them into four main categories: Initial Letter Recognition, Capital/Lower Case Matching, Alphabetical Order, and Beginning Phonics.

Initial Letter Recognition: Whether you teach letter names initially or introduce your child to each letter’s primary sound, helping your child to recognize the shape of each letter is one of the first hurdles to overcome in the journey to reading.

  1. ABC coloring pages – A quick internet search will turn up dozens of these free printables.
  2. Alphabet crafts – Whole Pinterest boards have been devoted to this topic.  Find your favorites and go to it!
  3. Alphabet tracing pages –  I’m partial to Getty-Dubay Italic, which isn’t something you can find lots of freebies for, but if you’re not quite so picky, there are lots of free tracing pages for early learners to work on the sound and shape of the letter in tandem.
  4. Sandpaper letters – Purchase some pre-made letters or make your own.  You can use sandpaper, glitter glue, glue sprinkled with sand…  Look for tutorials for this tactile learning tool, and you’ll find plenty of options.
  5. Playdoh letter mats – These consist of a laminated letter outline for your children to cover with PlayDoh.  Look for free printables online.
  6. Cuisenaire rod letter patterns – Somewhere out there on the interweb is an entire book of Cuisenaire patterns for each letter (including pictures that go with the letter).  I did find it once after seeing it mentioned, but I don’t have the link for it at the moment.
  7. Letter building with straight lines and curves, HWOT style – Have you seen the Handwriting Without Tears letter building supplies?  They consist of short and long lines and big and small curves.  You can purchase theirs, look for a template (I printed a template and traced it onto foam sheets), or design your own.
  8. Letter magnets – The Leap Frog variety come with a magnetic holder that sings each letter’s sound, but plain ol’ letters abound and can be used with equal success.
  9. Alphabet puzzles (also useful for learning alphabetical order) – Take your pick.  We own the Melissa and Doug Alphabet Train one and a small cardboard-frame one that my mom purchased long ago, but there are tons available.
  10. Adding a toy car or truck to the letter hunt can keep the activity fun and playful.

    Adding a toy car or truck to the letter hunt can keep the activity fun and playful.

    Letter hunt – Neatly print letters on index cards (I used half-cards, since I wanted something compact.) or use a deck of pre-printed letter cards.  Spread them across the floor and have your child hunt for a particular letter.  This can be made more fun by driving a dump truck around the room to collect the desired letter or handing your kid a shopping bag and asking them to “shop” for a certain letter for Alphabet Soup.  For beginners, printing only a few letters several times each can make this game more fulfilling and less frustrating.

  11. Letter Wall – A little like a Word Wall used in schools, this is simply a place on the wall where you post the letters you’re learning. Some kids are very visual, and having the letters visible during their day-to-day activities will cause the letters to stick in their minds more.  My kids seem to stand and ponder anything I post in their line of sight.
  12. Spontaneous Letter ID – Using your posted letters above to reinforce letter learning throughout the day. At random points when walking past the letters on the wall, shout, “Child-of-Mine, quick!  Can you tell me what this is?”whilst pointing to a letter at random.  Hamming it up for dramatic effect will make this fun rather than tedious.
  13. Alphabet booksDr. Seuss’s ABC and Chicka Chicka Boom Boom are two of the most popular, but there are dozens—perhaps hundreds—of other options.
  14. Starfall.com – This website has animations for each letter, reinforcing the letter sound and emphasizing the lower case version of each letter. Many of the letters have a quick game at the end—a matching game, letter sorting, etc.  (The learn-to-read content of this site is free; there is a great deal of other content available—colors, numbers, math games—for a nominal fee.)
  15. Leapfrog Letter Factory video – Many people love this video as a way to get the letter sounds to stick in their children’s minds. Cute animated letters demonstrate their sounds multiple times in this musical adventure story.  Appealing for kids from 2-5ish.
  16. Letter matching – Help your child work on visually distinguishing between letters by providing a collection of letter cards for them to sort. This can be done before your child even learns letter names or sounds, simply allowing the child to become familiar with the shapes of various letters.  Use ONLY one type of letter—capital or lower case—and one font, to avoid confusion.
  17. Letter roadmaps – create your own little roadmap. (I made one using Paint.) Add a letter road name to each block of each road, and see if your kiddo can follow directions to drive their car around town.  (“Start by the green house and drive down “a” street.  Turn onto “g” and stop when you get to “d”.  What building are you near?”  Or, if you are working on one or two letters, use only those letters to name the blocks, and ask your child to get from one point to another using only roads with a certain sound.)

Capital/Lower Case Letter Matching – Our language forces your child to learn each letter not once, but twice!  (Well, with the exception of a few easy ones like O and C…)  Here are some ways to help your child make those connections.

  1. Big and Little Matching – As your child learns the pesky fact that each letter has both a large and a small version, they can familiarize themselves with both versions by matching. School Zone makes a deck of letter cards with matching adult/baby animals to help those children who are just learning to match large and small letters.  (This also adds a storyline to your game, if your child is one for whom “Help each Mommy letter find its lost baby” would make the activity more appealing.)
  2. Letter Go Fish! – The deck of cards from School Zone mentioned above is actually intended to be used as a Go Fish! Style matching game. Try using the cards as intended.
  3. Big and Little Memory – Need to spice things up or focus on just a few difficult large/small letter pairs? Try using letter cards memory-style.  Select several large/small letter pairs , turn them upside-down, and arrange them in rows.  Have your child turn over two at a time to try to find a match.

Alphabetical Order – This is a surprisingly useful skill in education (need to use the library?  look for a topic in an index?  find your name on a roster?), but one that’s often taught later or not at all.  An early familiarity with ABC order can make later usage a breeze.

  1. Alphabet Maze – Print out an alphabet maze for your child. They can continue working on recognition of letters while also reinforcing alphabetical order.
  2. Alphabet Cards – Use your alphabet cards from one of the matching games above and have your children put them in ABC order. This can be done with only one set of letters or with both the large and small ones together—though that many cards can be overwhelming initially, forcing a child to balance letter matching with remembering alphabetical order and thus making the activity twice as hard.  It’s best to start with one set of alphabet cards and add the other later if extra challenge is desired.
  3. ABC Dot-to-Dots –For some reason, my kids never liked these as well as their numerical counterparts, but they are a wonderful way to reinforce both letter recognition and alphabetical order.

Beginning Phonics – Did you know that phonics work starts before reading?  Early phonics is merely an understanding that words are made of sounds and the ability to distinguish what those sounds are.  These activities will help prepare your child for blending sounds into words as they learn to read and for breaking words into sounds as they begin to write and spell.

Make sure your child can easily identify each picture, or this game will quickly become frustrating.

Make sure your child can easily identify each picture, or this game will quickly become frustrating.

  1. Sound Matching – Collect a variety of objects, either real or in pictures. Ask your child to name each object.  If you are focusing on a specific sound, have them label only objects with that sound.  (For example, when you work on /a/, an apple, an abacus, and an ant would each receive an “a” label.)  Alternately, you can provide phoneme cards that match the first sound of each object and ask your child to match each card to its appropriate object.
  2. Match My Sound – Great for those sitting-around-waiting sorts of times—like car rides, restaurant visits, and checkout lines—this game consists entirely of picking a sound and seeing how many words you can think of that start with that sound.  If your child suggests “watermelon” as a /s/ word, simply repeat the word slowly, emphasizing the sounds, and say, “That was a good guess, but wwww-atermelon starts with a /w/ sound.  We’re trying to think of things that start with /s/.  Can you think of any?”  It may take a long time listening to your modeling, but eventually your child will get the hang of this pre-reading/spelling skill.
  3. Phonogram Bingo – Create a simple bingo card with one letter in each square, and prepare a matching set of letter cards. For a straightforward game, make the sound that corresponds with the card you draw, and have your child cover the correct letter.  To add challenge, you can say a word that begins with the appropriate sound and see if your child can determine the correct letter to cover.
  4. Rhyme Time—Another verbal sitting-around-waiting activity, this game is played like Match My Sound except with rhyming words. Start with short and simple words with common endings (-at, -ad, -ip).  Again, if your child suggests a word that doesn’t rhyme, try to emphasize the sounds in the word to help them hear the difference between its ending and the target ending.
  5. Modified Rhyme Time – For an alternate version (or if your child struggles to generate their own rhymes), try this: Think of two or three rhyming words and one that does not rhyme.  Say the words in any order and see if your child can identify which word is not like the others.  This will help them train their ears to hear the sounds in words.
  6. Mr. Fast and Mr. Slow – Tell your child that you are Mr. (or Miss) Slow. Mr. Slow speaks very slowly.  Your child will be Mr. (or Miss) Fast.  Their job is to say the same word quickly.  You as Mr. Slow will slow a word down to emphasize its individual sounds.  Your child will blend those sounds together to say the word at regular (fast) speed.  So, for example, if you said, “/m/-/a/-/d/,” your child should respond, “Mad!”  (Do you recognize this skill?  It’s what a child does as they learn to sound out words!)  If your child seems to grasp this concept, they may derive even more glee from the game if you pretend that Mr. Slow is trying to think of words they’ll never figure out, lamenting exaggeratedly every time they succeed.  My children were in fits of giggles over my silly over-acting and their success at thwarting Mr. Slow.
  7. Mr. Fast and Mr. Slow Reboot – Switch roles. Now instead of you saying the word slowly and your child blending it together and saying it at regular speed, see if they can be Mr. Slow, breaking the word into its individual sounds for you to reassemble and say speedily.  (Guess who’s working on foundational spelling skills!)

If your child is solid on these pre-reading skills, he might be ready to move on.  Check out some next-step activity options in my post 12 DIY activities for emerging readers (plus three free online resources!)

You may also want to check out my posts on fine motor development and math activities for young kids.