experiential science: maps and mapping

As I mentioned in my last post, my kids’ idea of science is hands-on fun, so I’ve been supplementing the Building Foundations of Scientific Understanding (BFSU) book with lots of activities.  Here’s what we’ve been doing in the past few weeks with maps, based mostly on BFSU lessons D3 and D3A, which you can read for more ideas, terminology, and discussion starters.

**Caveat: My kids have long been intrigued by maps, so we’ve studied and drawn maps quite a bit.  If you have not done this, I’d suggest reading through something like Joan Sweeney’s Me on the Map to help your kids get a basic idea of maps and mapping before you start. BFSU also suggests a lot of pondering maps together.

Activity 1: Spot the Error

Make a few maps of places with which your kids are familiar–rooms in your house, your neighborhood, etc.  On each map, include one or more errors.  These could be misplaced items, missing elements, or even things that are out of scale.  See if your kids can spot the problems, and talk about how important it is for maps to be accurate.  Do cartographers include everything on their maps?  How do they determine what to include or not include?  Is there ever a time it’s okay to have some things not to scale?

Activity 2: Create-Your-Own

Have kids choose a familiar place and make a map of it.  Your accuracy requirements can match your child’s ability, but do remind them of what they learned about scale and accuracy in the previous example.

Activity 3: Treasure Hunt

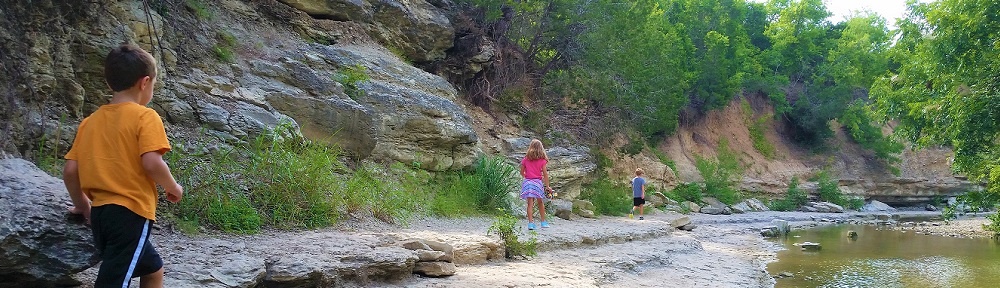
Make a few treasure maps of your home, yard, or neighborhood, complete with an X to mark the treasure.  (Make sure to take time in advance to hide something!)  We like to have bits of our snack as treasure, but anything will do, so long as your child is able to successfully navigate to the treasure.  This works best if you start simply–a map of the room you are in–and get more complex, working up to a large map that requires them to navigate through the house or to a point across the park.  If you really want to amp up the excitement, you can have the first two or three maps form a chain (use one map to find the next one) that leads to the treasure.

Activity 4: Geocaching

What better way to make map-reading seem useful than to introduce kids to the modern version of a treasure hunt!  We signed up online and downloaded the free app, and my kids had a great time trying to figure out how to read the maps to figure out where to look for the caches–and even more fun when they got to trade loot!  (They were especially motivated because they had just read The Boxcar Children book The Box that Watch Found, which was about geocaching!)

Activity 5: Navigation Practice

Planning to go somewhere new?  Inviting new friends to your house?  Have your child look at a map and write directions to a particular location, using street names and cardinal directions.  Then head out in the car and test their work!  My oldest is remarkably good at this.  (I’ll wait a few years before I try following any directions given my my little guy!)

Activity 6: Backup Plan

Maps

Apparently sundials work best when well-decorated.

What can you do if you find yourself without a map and your smartphone dies?  Well, folks haven’t always relied on smartphones or even maps to navigate.  Enter–the sun!  After reviewing the cardinal directions and relating them to our place in space, we began pondering the way in which the sun appears to move from east to west and talked about how that knowledge could help us.

  • Sundial – Using these directions from the National Wildlife Federation, we made sundials.  I have no idea how they thought pushpins would hold the plates to the ground, but we had to weight each one with a heavy stone.
  • Shadow Tracing – We traced each child’s feet on the driveway–be sure to leave plenty of space between the kids!–and returned to the same spot throughout the day to trace our shadows.  This made it easy to see how shadows shift in relation to the direction of the sunlight.

experiential science: solutions and crystallization

We’re studying science through Bernard Nebel’s Building Foundations of Scientific Understanding (often simply referred to as BFSU), which is a delightful program.  We’re still working through the first book, intended for grades K-2.  Nebel walks through each topic, explaining concepts and terminology to the instructor, giving guidelines for sharing the material with students (mostly through Socratic discussion), and providing a list of useful books.  Lessons are not strictly linear, but weave between the branches of science and can be arranged as best suits the learners–though Nebel explains that certain concepts must be understood before others can be introduced. The only lack in Nebel’s material, in my opinion, is its minimal use of hands-on exploration.  While most concepts are introduced with a demonstration, they are often developed verbally.

My kids LOVE science, but when they think science, they think messy and playful. So instead of trying to look elsewhere for curriculum, I decided to build on the awesome foundation provided by BFSU by doing quick searches for hands-on ways for my kids to experience the concepts.  I thought I’d share my results here.

Though I’ve been doing this for a while, it just now occurred to me to share my work, so I’ll start with one of our recent units: solutions and crystallization.  The activities and our discussions were based on Lesson A-9 in the first BFSU book.  You can read for yourself to glean discussion points, but I’ve listed my activities below.

mixorsolutionActivity 1: Mixture or Solution?

First we had to determine the difference between a simple mixture (which we’d already discussed) and a solution.  I’ll list my supplies below, but don’t feel bound by what I used–I just chose what I had on hand.  Nebel describes a simpler form of this activity in his book.

  • Supplies: clear containers, water, stirrers, various substances for mixing
  • Gather a variety of similar-looking substances.  I chose sugar, salt, flour, bread crumbs, vanilla, and sand.  (I also had oil on hand for the oil/water/soap experiment that Nebel describes.  I won’t bother to replicate it here, since it’s in the book.)
  • Assemble one small container of water (preferably a clear container) and a stirring implement (I used toothpicks) for each of your substances.
  • Have your kids stir a small amount of each substance into one of the containers.  What do they notice? Do some behave differently than others?

Activity 2: Crystallization

We did two separate crystallization activities in one fell swoop: Borax and rock candy.

  • Designer Crystals (Requires pipe cleaner, Borax, water, jar, string, stick)
    • Using a pipe cleaner (or two!) let your children form a design on which to grow crystals.  They can make a letter, their name in cursive, or simply some squiggles, but be sure the design can be lowered into your chosen jar (and lifted out again!) without touching the sides or the mouth of the jar.  You’ll need a bit of extra room to get it out once it’s laden with crystals.
    • Tie your pipe cleaner to a string and your string to a stick.  You’ll balance the stick across the mouth of the jar and the string will dangle your design into the water.  Be sure your design will be completely submerged but NOT touching the bottom or sides of the jar–leave at least a half-inch clearance, if not more.
    • Measure how much water it will take to fill your jar, and heat that amount of water.  You can do this via the stovetop or a microwave.
    • Once your water is hot, stir in a generous helping of Borax powder.  Different people recommend different amounts, but this experiment doesn’t seem too fussy.  I accidentally got two batches with different amounts, and both worked fine.  The idea is to super-saturate your liquid.
    • At this point you can add food coloring if you’d like, but the color of your pipe cleaner seems to be more powerful than the color of the crystals.  Wait for your solution to cool before pouring it into the jar (or before handling the jar, if you opted to microwave it).
    • Dangle your design in the jar of Borax water and set it aside where it won’t be disturbed.  Our designs were heavily covered with crystals within hours, to the point where I had to pry them from the bottom with a knife.  The results were pretty exciting!
  • Edible Crystals (Requires skewer, sugar, water, jar, springy clothespin, rulers)
    crystals

    Borax (foreground, already finished) and rock candy (background, looking like nothing yet)

    • Measure your skewer and clip a clothespin on it so it will balance on the mouth of your jar and dangle inside without touching the sides or bottom of the jar.  If you need to, use rulers to make the mouth of your jar more narrow so the clothespin can balance.
    • Measure how much water you need to fill your jar.  Pour this into a saucepan and heat it.  Keeping your water just below boiling, begin to add sugar at a rate of about a half-cup at a time.  I’ve read that you need about 3 times as much sugar as water; I forgot to measure, but I know I used waaay more sugar than I thought I would and had to stir way longer that I thought I should to see if it would dissolve.  (The kids got bored and wandered off.)  By the time my liquid was super-saturated, the top seemed to get cloudy and not clear up even after I stopped stirring and let it settle some.
    • Let your liquid cool until it’s easy to handle.  (Otherwise at the very least you risk burning your hand while handling your jar!)  Pour it into your jar, being careful not to pour any undissolved crystals of sugar into the jar.  (Rock candy is easiest to eat on a stick, not stuck to the bottom of a jar.)  You can add food coloring if you’d like.
    • Balance your skewers atop the jar and be prepared to wait at least a day before seeing any difference at all and a week or more before you have something worth chewing on.  Some people say this process can be sped up by dipping the skewers into the solution, rolling them in sugar, and letting that coating dry before dangling them.

Activity 3: Solar Still

I like to have a “so now what” type of moment about the things we learn.  So how can we use our knowledge of solutions?  I posed a real question to my kids: Suppose you were stuck on a boat in the ocean and you ran out of water.  You know that salt water will kill you.  How can you get fresh water other than waiting for rain?  I could have let them develop the whole thing on their own, but once they had the concept I put together a solar still and had them figure out how it worked.

  • Supplies: salt, water, large bowl, glass or heavy container that fits inside bowl and is shorter, plastic wrap, rock
  • Mix some saltwater in the bottom of your large bowl.  Taste it if you’d like.
  • Place your glass in the middle of the saltwater.  It has to be a glass or something heavy, otherwise it’ll float around or tip and ruin the experiment.
  • Cover the bowl with plastic wrap, ensuring that it is tightly sealed around the edges.
  • Place the rock on top of the plastic wrap, centering it over your empty glass and making sure it slightly depresses the wrap.
  • Put your still in a warm place and wait for the results.  Alternately, you could speed up the natural process by using warm water that will already be evaporating reasonably fast.

thoughts on writing and editing with kids

I haven’t posted since the beginning of November, when I nervously embarked on my misguided, first-ever NaNoWriMo.  I was right, using every moment of my free time to write and not getting to bed until midnight or later did take its toll.  In fact, it’s only now that I’m starting to feel human again.  By December I was 100% burnt out.

This month I had intended to edit my novel as suggested by the folks at NaNoWriMo, but I can’t bring myself to touch it yet.  My kids, on the other hand, have been begging to get back to their beloved Young Writers Program (the kids’ side of NaNoWriMo) stories, so we’ve started the editing process.

Initially, I had thought that we would attack their stories element by element, channeling the story-writing checklists I made years ago as a teacher: read to make sure it made sense, edit for spelling and punctuation, polish the beginning, work on some description, check for vivid verbs…  But as soon as we began that first read-through, that approach felt too fragmented.

No, editing your work is really more holistic than that.  When I read over my writing, I don’t scrutinize just one part of speech at a time, I assess the overall effect of my words–am I clear?  Is the tone right?  Do I have enough detail to create a complete picture but not so much as to drown my reader?  And so I began it with my kids.

After our initial read-through on that first day, we’ve been taking the stories a paragraph at a time.  First I read the paragraph (or section, if it’s dialogue) aloud to them and ask if there’s anything they’d like to change.  Then I go through it line by line and help them improve their work.  I show them where pronouns have unclear antecedents, I explain my mental image after a particular sentence and have them clarify or correct as needed, I point to something I find interesting and ask for more detail, I ask if they can pick a more interesting noun or verb or adjective to replace a mundane one, I ask if a certain section has anything at all to do with the plot.

As we’ve gone through this process, two things have struck me:

  1. The over-the-top colleague who insisted on spending hours each week poring over her third-graders’ writing word-by-word with each of them…she actually had the right idea.  Somehow I had it in my head that excellent writing would just begin to grow naturally in children and I should keep my hands off lest I taint their authenticity.  After all, I learned to write simply by writing.  But I learned to draw well in part because of careful instruction.  I learned to clean and to cook and to drive because of supervised, scaffolded experiences.  Why shouldn’t writing be the same way?
  2. This whole experience affirms for me the need to approach writing instruction from multiple angles.  I had tried a theme book from IEW (Institute for Excellence in Writing) and loved what my children learned–vivid verbs, who/which clauses, sentence openers…but by halfway through we were feeling stifled by the routine and the narrow constraints of the assignments.  This year I thought we’d do more freewriting, but sometimes we’re just not inspired to write, and often the results of our inspirations were lackluster.  Editing with my children has shown me both the joy my children glean from their own creative writing and the worth of a program that helps them learn the tools to write well.

So how will this affect writing instruction in our household?  First of all, I’ll remember that my active modeling and instruction will help their writing develop just like it helps other skills.  And I’ll remember from now on that I do not have to commit wholeheartedly to one ideological camp or another, nor do I have to finish one curricula in sequence.  As I’ve learned with all the subjects we’ve worked on so far, the best choice for our family is a sprinkling of different things.  So going forward, I just might pull out that other IEW theme book I purchased and choose a lesson or two to do…and then perhaps we’ll do some writing of our own and try applying our new techniques to our own writing.  Because writing is both mechanics AND creativity, and having them come together seamlessly takes practice.