We continued our weekly family book club this year to keep exposing the kids to books they might not otherwise choose to read, and I once again worked to find books that (sort of) matched what we were studying in history and worked well for all three of my kids as far as interest/length/content were concerned. (This year they were in 7th, 6th, and 4th grades by age.)
This year we did a world history overview, so I tried to find books from all over the world in all different periods of history. I browsed book lists and read reviews and tried to find stories that were reasonably authentic and hadn’t aged poorly if they were older books. Some eras in history and parts of the world don’t have as many stories available, so that made for an interesting family conversation, as well. Since I had such a long list, a few of these turned into family read-alouds instead of book club books. Here are the books we read this year and our general opinion of them:
I can’t believe that it’s this time of year already! I feel like this past year, insane and limited as it was, flew by. I’ve had a hard time choosing curriculum for this coming year: I want it to be rigorous since my older two are in middle school, but I still want them to enjoy learning. Add to that the fact that I’m not sure what extracurriculars are going to be available to us because of the ever-changing nature of this pandemic, and I’m not sure how much at-home vs. on-the-go time to plan on. But I’ve done my best, and here’s what I’ve come up with:
To be honest, I’ve never loved the idea of teaching a “Literature” class. I’ve done it as a brick-and-mortar school teacher, since it was required of me, but I always felt a bit as if I was killing the story for everyone by asking them to analyze every aspect of every chapter as they went. There’s definitely a place for literary analysis, but I don’t think it should hinder that first-read-through enjoyment.
Up until this year in our homeschool, I haven’t had any required reading. I’ve wanted my kids to read for enjoyment and to grow naturally as readers–and subsequently, as writers and thinkers, since reading teaches you to write and expands your world. There were long stretches of time when one or another of my kids didn’t do much reading at all. Though if I’m being fair, that’s not strictly true: they simply weren’t reading formally. They’d obsess over video game Wiki pages, write notes to their siblings and read the responses, browse magazines I’d left open on the counter, reminisce by reading through a long-loved picture book, or giggle up a storm at one of the cartoon anthologies my husband and I have from days of yore. So they were reading, but I bit my fingernails wondering if they were doing enough. You know how that goes?
At this point, my twelve-year-old is re-reading the Septimus Heap series at top speed, having recently read through every Rick Riordan book ever written. My eleven-year-old has transitioned from a Rick Riordan obsession to a memoir/biography obsession. My nine-year-old is still in the eclectic reading phase: he’ll pore over military encyclopedias, read Calvin & Hobbes until he’s practically got the anthology memorized, devour elementary nonfiction on topics that fascinate him, and make his way through picture books of the long-and-difficult variety. Most importantly to me, all three of my kids see reading as something they enjoy and pursue of their own volition.
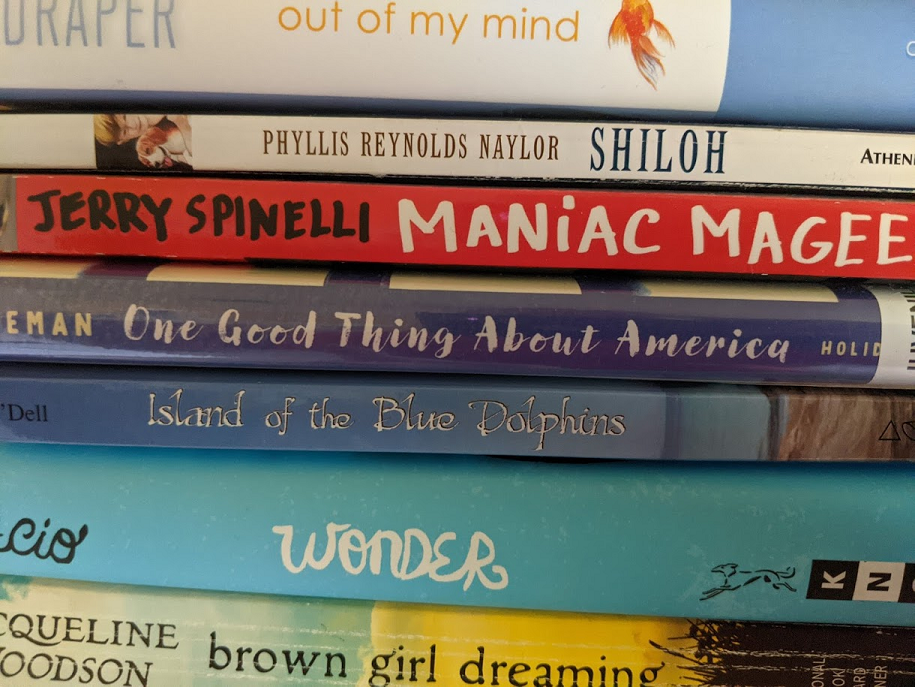
Here are some of the books we read this past year. (A couple more were borrowed from friends or are currently loaned out to others.)
This past year, however, I decided it was time to help them stretch beyond the bounds of their natural inclinations. There are SO MANY good books out there that my kids weren’t reading: either the cover art wasn’t exciting, the genre didn’t appeal, or the text looked too intimidating. Thus, the Family Book Club was born. Okay, okay, so ‘Love isn’t participating since we meet while he’s working, but hey, ⅘ isn’t bad, right?
I love the start of a new semester! The excitement of curriculum planning has always appealed to me. This year I’ve decided to steer my kids towards a bit more rigorous and independent work, both because they’re reaching middle school and are ready for more independence and challenge, and because we have no social life vying for our time. So without further ado, my curriculum choices for this year:
This year was a hairy one, since I was working valiantly to balance academics with extracurricular activities and social opportunities. Here’s our curriculum for 2019-2020:
This is the first year I’ll have three kids fully in the work rotation, though Pookie did some light daily work for the last half of the previous year. Here are my curriculum choices for everyone:
We just finished an awesome six weeks of studying some really cool topics that my kids wanted to learn more about. Today I thought I’d share the fun we had studying knights and castles.
Books were a big part of our study, though I tried to include as much hands-on as I possibly could. (I’ll include a description of how we used the different books below for your perusal, along with a quick-reference list of all our resources at the end. Our read-aloud stories–featuring King Arthur and Robin Hood–are listed and described at the very bottom of the post, below the reference list.) Continue reading →
Out of the blue, the kids decided that dinosaurs sounded like a fun topic of study, so I dutifully planned to incorporate a dino study in our next six-week block. (We have taken to block scheduling in six-week increments, and it’s glorious!) I had a little more trouble with the “hands-on” and “experiential” portion of this study, but I did my best!
Background: Fossils and Paleontology
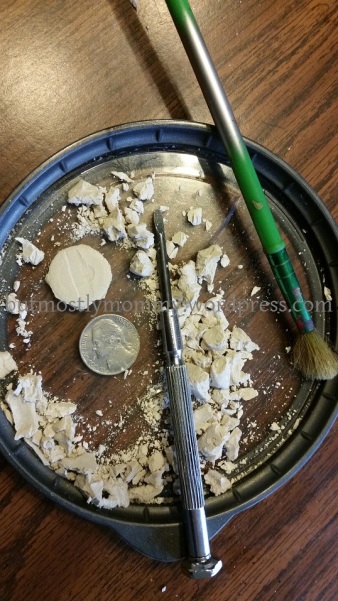
Our finished product left us with both an artifact and its imprint.
To begin our study of dinosaurs, I wanted to provide a little background information on fossils and paleontology. I began our study with these three activities, which I did on three separate days. The book Fossils Tell of Long Ago (Aliki) provided a snuggly way to reinforce the hands-on learning.
Discovering Fossils – This first activity requires a bit of advance preparation. Select a small object to be your “fossil” and wrap it inside a small lump of air-dry clay. I chose a coin, since I figured it wouldn’t break and cause dismay if my kids accidentally chipped away at their clay with too much vigor. Make sure your air-dry clay lump is not too big or it will take an eternity to dry and/or crack open as it dries. Mine was fine within 12 hours, but I kept it small. (I’ve also seen this activity done by coating objects with petroleum jelly and using plaster of Paris to bury them, but I already had clay on-hand.) When you’re ready for your activity, provide your kids with a few different tools to uncover their fossil. We used small screwdrivers for the grunt work and paintbrushes for the final dusting.
Fossil Imprints – Often what paleontologists find is what ISN’T there. We happen to have some bathroom tiles with impressions of various leaves stamped into them, which we used to discuss fossil imprints. We also have a local park at which the planners thought they would cleverly imprint various animal tracks in the wet cement (except that at times you can see the marks of the tool they used to roll on those tracks…). Both these and some PlayDoh fun allowed us to see what sorts of imprints plants and animals might have left behind.
This small paleontologist tries to identify a fossil to assemble his skeleton.
Assembling Fossils – Well, your little paleontologists have discovered some fossils–now what? Using some little dino skeleton kits from the dollar store, we pieced together a couple dino skeletons. We discovered that even with instructions this is pretty hard work because many of the pieces look alike. It’s hard to imagine how real paleontologists can take the few bits they find and determine what pieces they are and what type of dino they belonged to!
Dino Basics
Introductory Reading – Once we had some background knowledge, it was time to introduce some basic information about dinosaurs. We read both the picture book Magic School Bus: In the Time of the Dinosaurs (Cole) and Magic School Bus (Chapter Book #9): Dinosaur Detectives, but much of the information is redundant so you could easily choose either one or the other.
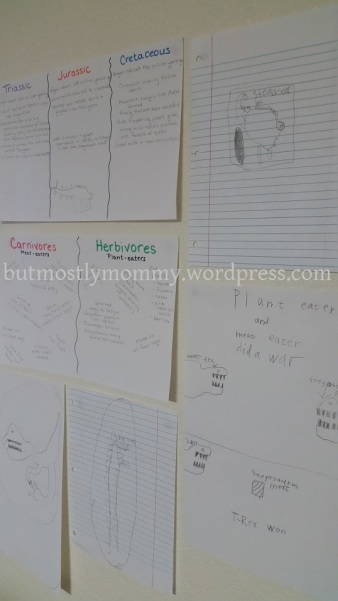
We posted our charts and some of the kids’ creations on a wall.
Dino Periods: A Quick Research Chart – Did you know that the “time of the dinosaurs” was actually divided into three distinct periods? Not all the dinos you’ve seen on T-shirts were alive at the same time, and the world was a vastly different place from the beginning to the end of the era. We checked out the book When Dinos Dawned, Mammals Got Munched, and Pterosaurs Took Flight: A Cartoon Prehistory of Life in the Triassic (Bonner) to give us a glimpse of the vast amount of time we were studying by taking on the topic of dinosaurs. While some of this probably went right over their heads, it had a LOT of information on the Triassic Period presented in humorous text and delightful cartoons.
If we had been doing a more in-depth study, I likely would have studied each period on its own. As it was, I knew we were just planning a brief overview. So our next step was to compare the periods and make generalizations about their climate and vegetation, as well as noting which types of dinosaurs lived in each period. I handed the kids a few books with each period marked and had them read and look for facts about each era, which I then copied onto a chart. They were surprisingly enthusiastic about this project and were delighted to admire the results of their “research”. (See our resource list below for book ideas.)
Overview: Oral Reading and Notetaking – Next we began a more thorough overview of the actual dinosaurs. For this, I chose to have the kids read the Magic Treehouse Research Guide #1: Dinosaurs (Osborne). They took turns reading chapters aloud over the course of several days, and as we made our way through the book, I suggested that each of them take notes on things they found interesting. Goobie chose to illustrate her observations, while Peatie preferred to make long lists of facts.
Dino Eggsperiment – In the course of our reading, we stumbled across a few interesting tidbits about dinosaur eggs. For one, they were probably a little spongy like reptile eggs, so they wouldn’t break when they were laid. (Some eggs have been found in a row, so some dinosaurs may have laid eggs as they walked!) We used a chicken egg compared to a playground ball to visualize this difference and the reason behind it. (What would happen if you dropped each from a foot or three off the ground? Try it! Which one would a baby dinosaur need to be inside to survive?)
Dino Eggsperiment, Part 2 – Additionally, paleontologists believe that the biggest dinosaur eggs would have been no larger than about 10 inches, or roughly football-sized. Why? Because the bigger the egg, the thicker the shell would need to be to support it, and they figure a baby dino couldn’t have broken out of an egg larger than that. We used clay (PlayDoh would also work) to help kids visualize the thickness vs. size comparison. You can make a small cup shape with very thin sides, but if you try to make a bigger cup with thin sides, it will collapse. Have them use toy dinos to try to break through a thin-sided cup and a thick-sided cup. What’s the difference?
Digging Deeper
Organizing Information: Dino Cards – Now that we had a basic overview of the Age of Dinosaurs and some knowledge of dinosaurs themselves, it was time to dig in a little more. Using our various books, we took a couple days to search for more information on the dinosaurs we had taken notes about during our reading–and discovered a few other interesting ones along the way. We made a notecard for each dinosaur, listing the period in which it lived, the family it was part of, its size, what it ate, and any other interesting tidbits we learned.
Herbivores vs. Carnivores: A Comparison Chart – It was time for a new chart. This time, we compared meat-eating dinosaurs with plant-eating dinosaurs, using our various books to check what we thought we knew about each variety before writing the facts on our chart.
Dino Reports – Each of the kids chose their favorite dinosaur to write a brief report on. Using the facts we’d listed on our cards, they crafted a paragraph about their dinosaur of choice. I loved how each kid’s paragraph showed which bits of information they valued and really incorporated their voice into the telling of the facts. Having already collected facts together, the kids merely had to select which ones to include, choose a logical order, and turn the bullet points on the card into full sentences. Actually, this was rather like the IEW (the Institute for Excellence in Writing) method.
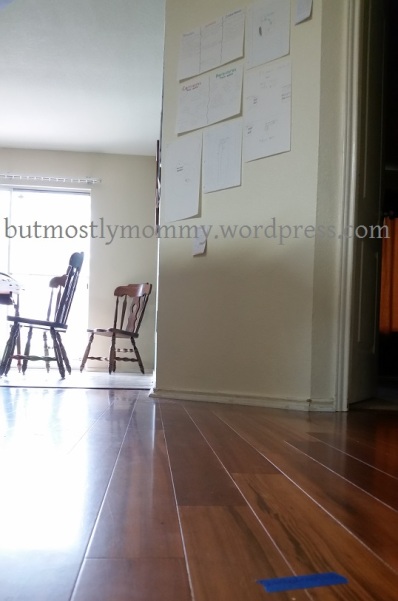
Dino Measuring – Finally, we took a handful of our dinosaur cards and set about measuring the relative sizes of the dinosaurs. We happen to have a nearly straight shot from one end of our house to the other, so we were able to measure from the front door and place labeled painter’s tape to mark the lengths of the various dinos. (Though we couldn’t fit a Diplodocus!) Then we hung the matching dino card on the wall beside the tape mark.
A measurement marker is visible on the floor, while our display wall marks the end of the dino measurement walk.
The Big Finish: Dino Tour
For our grand finale, we invited Daddy and Grandma and Grandpa to see what we’d learned about dinosaurs. (This was the kids’ idea!) The kids started at the front door and showed them our dinosaur measurements and dino fact cards (making sure everyone noticed the most interesting facts), pointed out our comparison charts and a few assorted other creations hung on the wall, and topped off the tour by reading their reports. They were so proud of themselves, and the grown-ups got to share a little of that joy and learn a little something new.
Resources:
Fossils Tell of Long Ago (Aliki) – A good early-elementary picture book on what fossils are and what we can learn from them.
Magic School Bus: In the Time of the Dinosaurs, Magic School Bus (Chapter Book #9): Dinosaur Detectives – The facts in these are, of course, more like accessories to the story, but they are a nice, gentle way of introducing some basics.
When Dinos Dawned, Mammals Got Munched, and Pterosaurs Took Flight: A Cartoon Prehistory of Life in the Triassic (Bonner)- This included way more info than we could really process in the single day we gave it, but it’s a brilliant mix of humor and information that was fun to read.
Magic Treehouse Research Guide #1: Dinosaurs (Osborne)
‘Love’s ancient copy of Dinosaurs and Other Prehistoric Reptiles (A Giant Golden Book by Watson) – While this had a LOT of text and not many pictures (though it certainly made sure to have realistic gore), we did skim some of the surprisingly-conversational information contained in it.
The Children’s Dinosaur Encyclopedia (New Burlington Books, Consultant Prof. Michael J. Benton) – This one had dinos organized by family with facts about the family and then details about each dinosaur. It was pretty cool!
Dinosaur (DK: Eye Wonder) – This is a great book for early elementary because the text is large, the reading level is pretty simple, and there’s not too much text per page.
Walking with Dinosaurs: A Natural History (Haines) – This one was more texty than we needed, but the photo-realistic images of dinosaurs in their likely habitats were really cool to look through!
The Usborne Internet-Linked Encyclopedia of World History (p. 42-59) – I was surprised to find several pages devoted to dinos in here, and the information was actually pretty nicely compact and easy to comprehend.
As we wade through history, I’m doing my best at a regional/chronological progression—a bit like a mastery-spiral approach. I’m attempting to spend several lessons exploring one particular period of a culture, then circling around to see what surrounding cultures were doing at the same time. After we circle around a region for a while, touching on the same cultures again and again over time, we can take a break to jump to far-flung regions of the world and see how they were developing during the same time span. It sounds logical, right? Well, we’ll see how it goes.
After learning about prehistoric humans and the transition to farming and city life, we moved on to study ancient Sumer. Here were the highlights of our study:
Overview
We got an overview of Sumerian life and historic contributions by reading in our Usborne Ancient History Encyclopedia. This University of Chicago interactive website also provides a fun look at life in Ancient Mesopotamia and how archaeologists work.
We did some map work and pondered the many contributions of Sumerians using this mom-made worksheet: First Civilization -Sumer.
We read Ludmila Zeman’s illustrated version of Gilgamesh to get a glimpse into the lives and beliefs of folks in ancient Sumer.
Ziggurats
Our ziggurats were very colorful!
We did some ziggurat research and reading, primarily by wandering around this website.
We pondered ziggurat construction using wooden blocks to show how a ziggurat looked. We also talked about how cities gradually became raised tells (or tels, as I always saw it before now).
We made our own ziggurats out of card stock. If you want to do the same, you’ll need some graduated squares. (I used my paper cutter to make squares of 8, 6, 4, and 2 inches. You’ll need to use two sheets of standard-size paper.) Your budding ruler-user can make a line ¾ inch from the edge of each side. You’ll slit each corner and fold on the lines to make a ¾ inch high square platform. (You may want to make your top layer only ½ inch high–like the one on the left–to make the folding easier.) My kids chose to decorate their papers first—colorful ziggurats are much more exciting. We simply used tape to hold the corners together and secure one layer to the next. If you wanted to be really detailed you could add a pair of stair-stringers–only upside-down, fitted into the steps of the ziggurat–with a piece across them to create a ramp on which to draw a gazillion tiny steps going up the side.
Cuneiform
We read about cuneiform. I did a bunch of cuneiform research and condensed my findings into kid-sized bites. (You can enjoy the fruit of my labor via the link below this section.) For our first round, we read about cuneiform and inspected the examples of how it changed over time.
The kids thought it was pretty fun to translate the cuneiform message.
We translated cuneiform. I used a cuneiform-style alphabet I found online (on this teacher’s blog) to make a page for the kids to decode. (This is also included in the PDF packet linked below. The message reads: “Cuneiform means wedge shaped. The Sumerians invented writing.”) To make this a bit simpler because my kids are young, I had each of them decode half of the message. They thought they were pretty cool, “translating” cuneiform symbols to read the message.
We wrote our own cuneiform. Using the cuneiform alphabet sheet from the last activity, each of the kids wrote their name in cuneiform. Then I had each of them pick three words to depict, creating their own cuneiform-style symbols. They drew a simple image for each word, changed it to all lines and wedges, turned it sideways, and further simplified it, imitating the real changes to cuneiform writing. (The worksheet we used is also included in the link below.)
Our finished clay tablets and our very-authentic-looking stylus
We made clay tablets. I was going to have the kids dig up clay in the yard for uber-authenticity, but it happened to be thunderstorming when we got to this lesson, so thankfully I had air-dry clay as a backup. Since we were also unable to look for sticks to use as styluses, I substituted those no-roll triangle-shaped crayons, which worked respectably. Each kid chose one or two cuneiform symbols to inscribe on their clay tablet. It’s harder than it looks to get those lines and wedges—the kids had a hard time remembering to make sure the point of the crayon was down rather than the flat side and understanding how to press the crayon down to make a line without squashing the whole crayon into the clay. They practiced once or twice before making the final product.
Here’s a PDF of my packet for Cuneiform–background reading, translation, and invention.